With Playlist Themes, you can customize the design of the Playlist Share Pages you send out from your DISCO. Themes are great for promo, such as when sending out an Album release, or if your business has multiple brands, labels, or Catalogs.
At a glance
By default, if you don't select a Theme for your Playlist, the Share Page will show your company logo and the default background:
Themes let you change the background, the logo, or both!
Creating a Theme
There are three ways to create a new theme:
- from your account settings
- from Playlist Settings
- when editing your Playlist
From your account settings
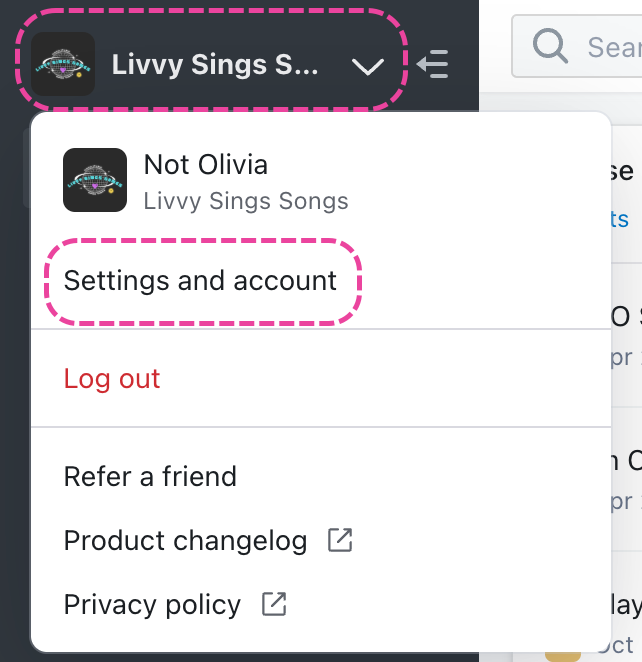
- In the top-left corner of your DISCO, click on your DISCO Business Name to open the menu.
- Select Settings and Account.
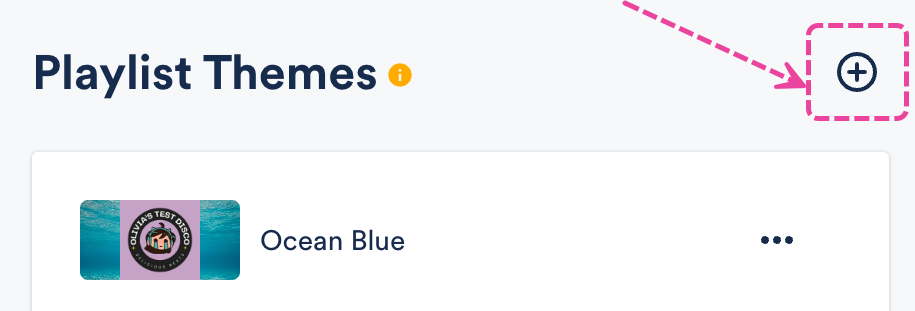
- Under Workspace Settings, select Themes.

- Click the + in the top right corner to create a new Theme.
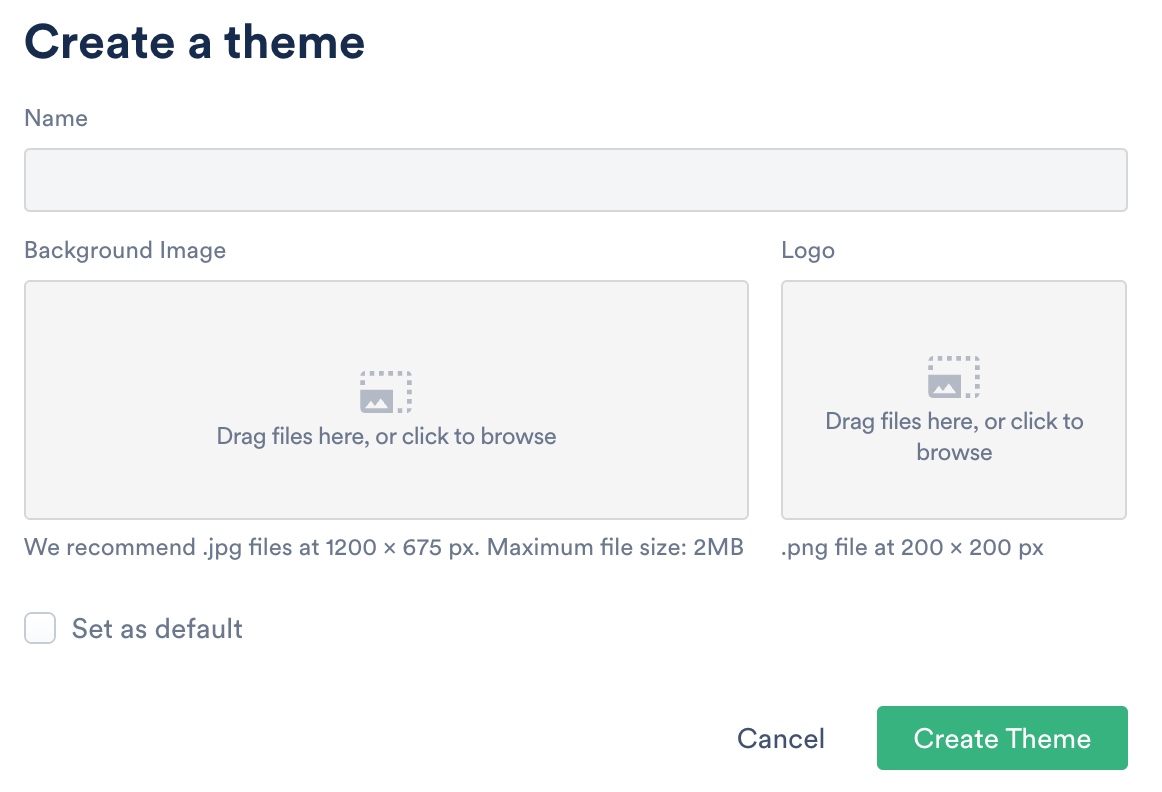
- Add a Name, Background Image, and Logo.

- Click the Create Theme button.


From Playlist Settings
- Open the Playlist menu (⋮) and select Playlist Settings.
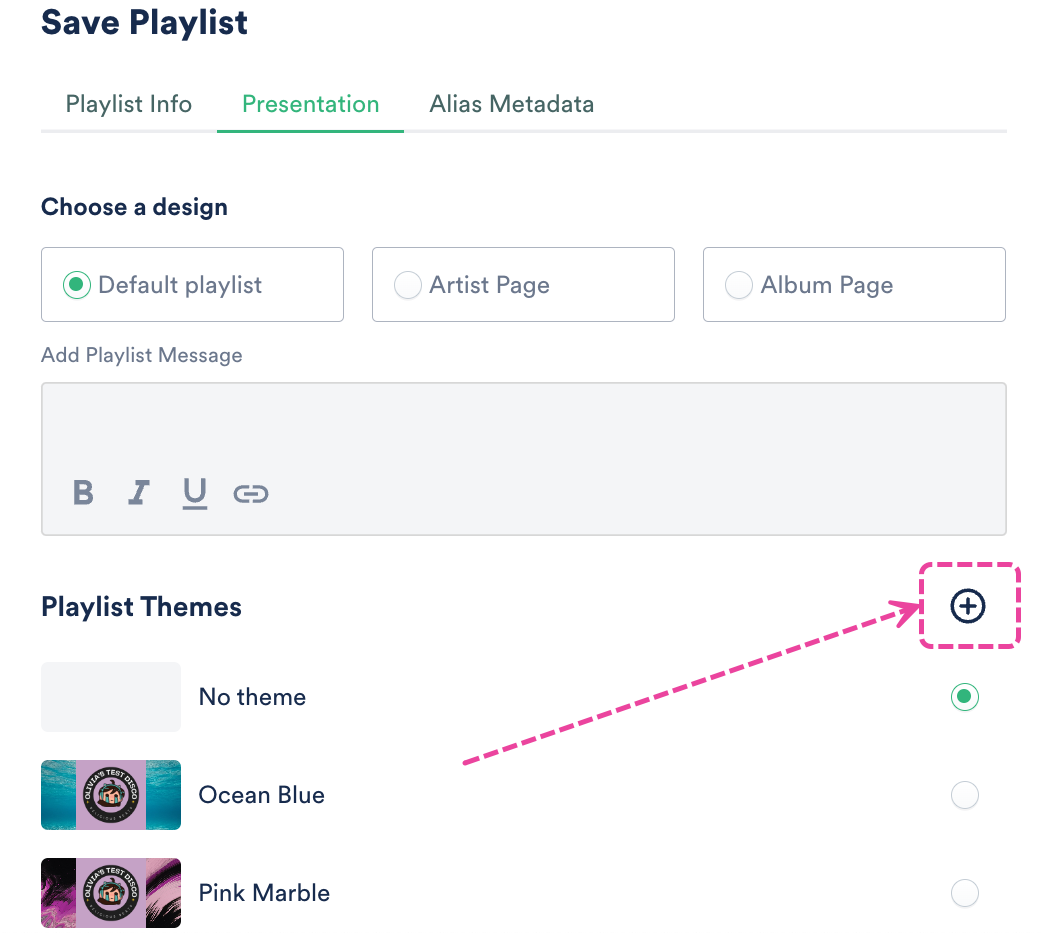
- From the Presentation tab, under Playlist Themes, click the + to create a new Theme.

- Add a Name, Background Image, and Logo.

- Click the Create Theme button.
- In the Save Playlist menu, click Save.


When editing your Playlist
- Open the Playlist menu (⋮) and select Edit playlist.
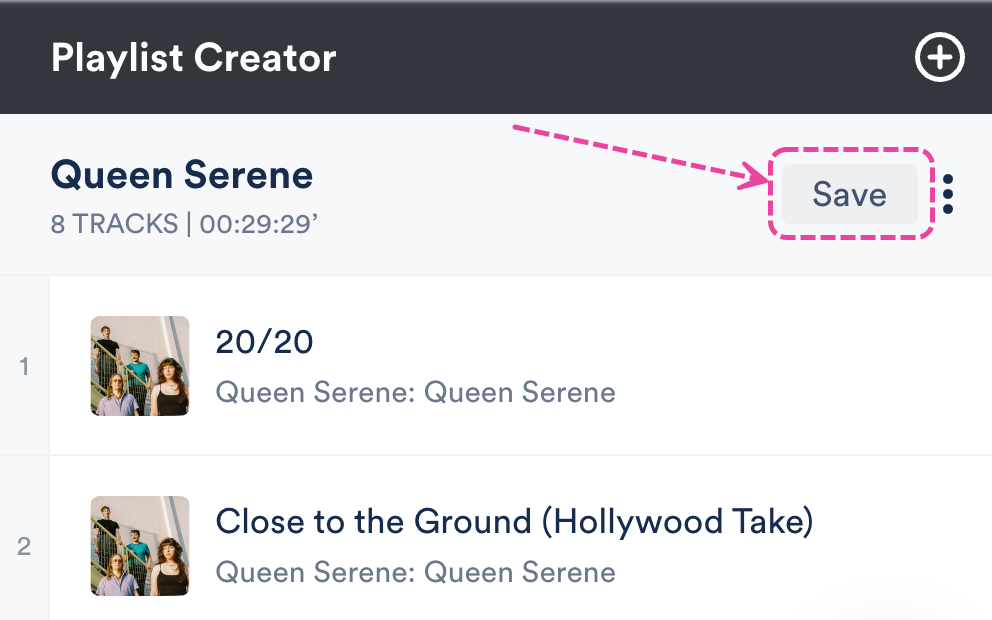
- This will open your Playlist in the Playlist Creator. From the Playlist Creator, click Save.

- In the Save Playlist menu, from the Presentation tab, under Playlist Themes, click the + to create a new Theme.
- Add a Name, Background Image, and Logo.
- Click the Create Theme button. The logo image should be a perfect square or circle to ensure proper rendering, and to maintain a consistent display across multiple devices.
- In the Save Playlist menu, click the Save button.


Adding Themes to Playlists
There are two ways to add a Theme to your Playlist:
- from Playlist Settings
- when editing your Playlist
From Playlist Settings
- Open the Playlist menu (⋮) and select Playlist Settings.
- From the Presentation tab, under Playlist Themes, choose an existing theme.

- Click the Save button.

When editing your Playlist
- Open the Playlist menu (⋮) and select Edit playlist.
- This will open your Playlist in the Playlist Creator. From the Playlist Creator, click Save.

- In the Save Playlist menu, from the Presentation tab, under Playlist Themes, choose an existing theme.

- Click the Save button.


Setting a default Theme
When a default Theme is set, every new Playlist you create will have that Theme applied by default.
There are two ways to set a default Theme:
- By checking the Set as default box when creating a Theme:

- From the ellipses menu (…) next to the Theme in your Workspace Settings.
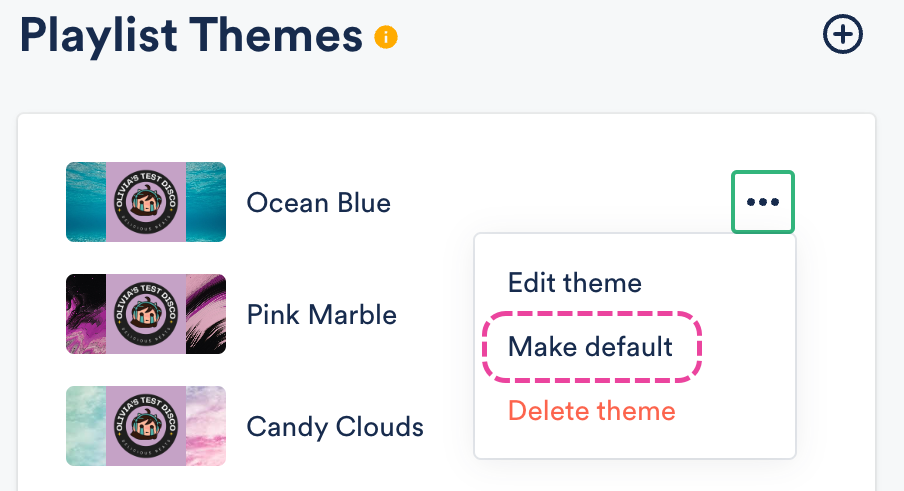 Your default Theme will have a DEFAULT label:
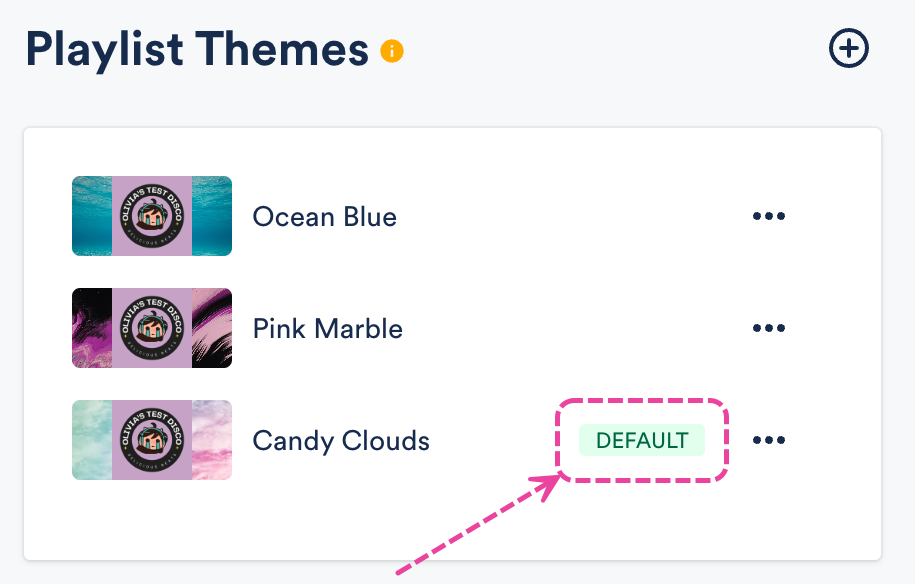

 Your default Theme will have a DEFAULT label:
Managing your Themes
You can do this from within your account settings:
- In the top-left corner of your DISCO, click on your DISCO Business Name to open the menu.
- Select Settings and Account.
- Under Workspace Settings, select Themes.
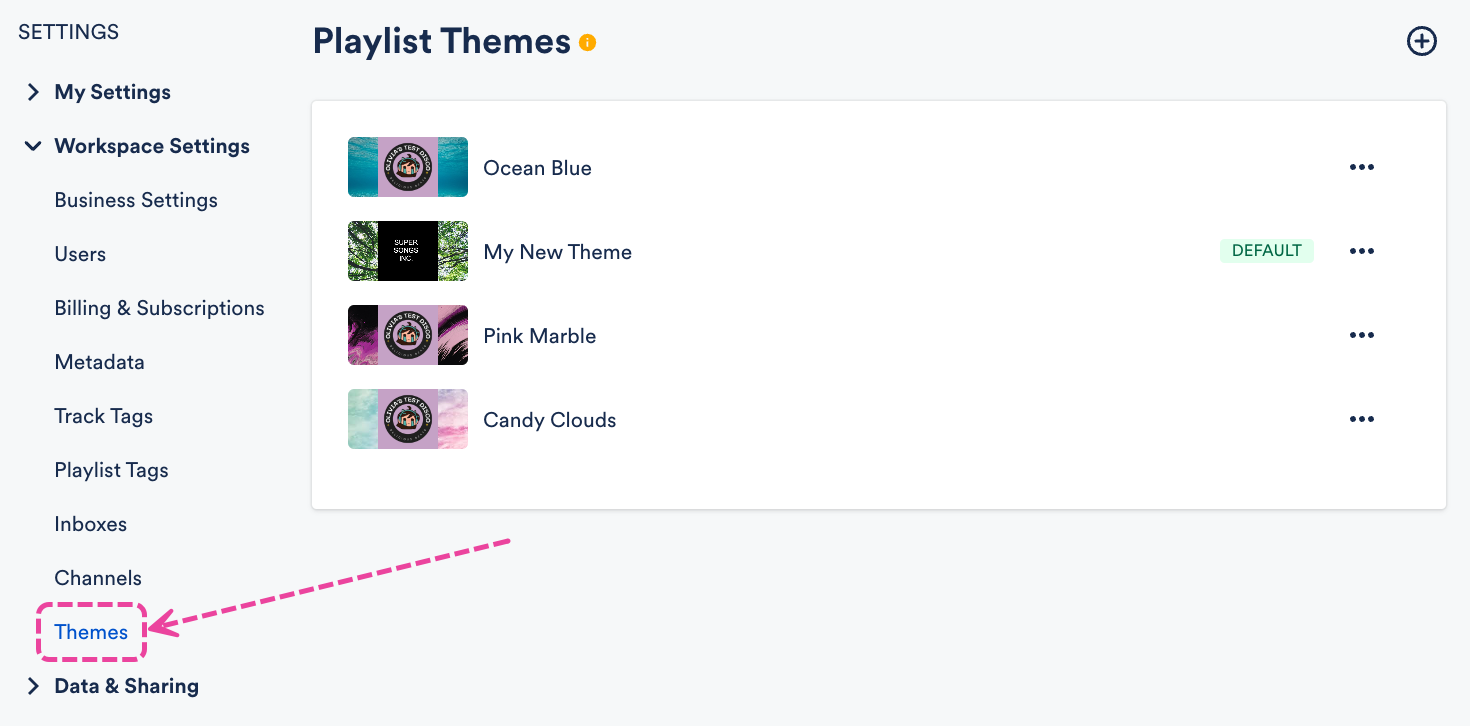

From here you can:
- View all your existing Themes
- Create a new Theme (click the +).
- Set a default Theme (open the ellipses menu … to the right of the Theme).
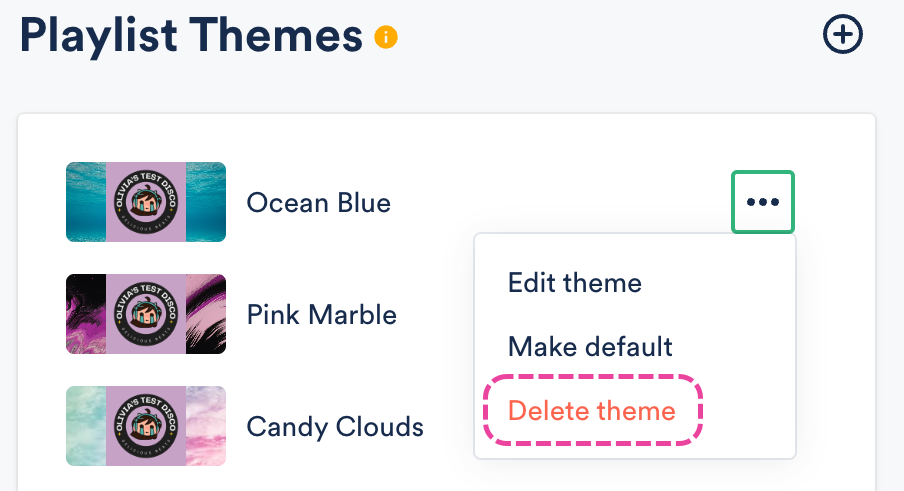
- Delete a Theme (open the ellipses menu … to the right of the Theme).

Sections help you organize and present different types of Tracks in your Playlists.
At a glance
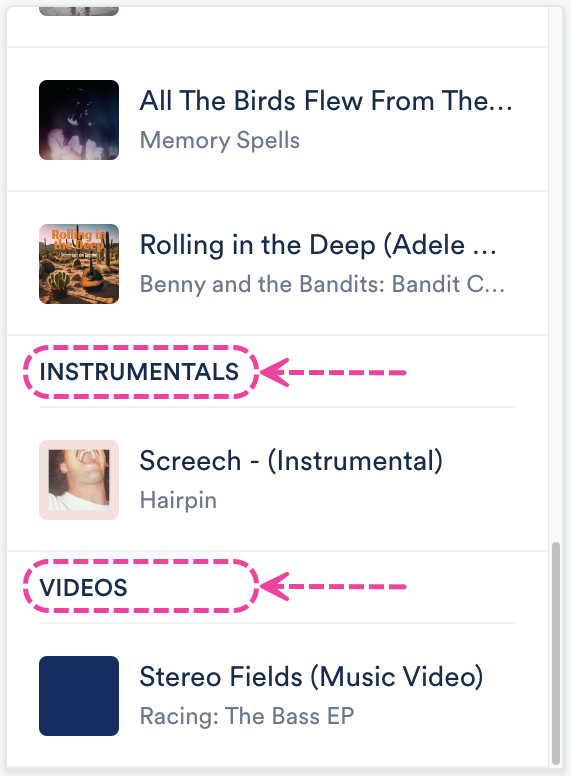
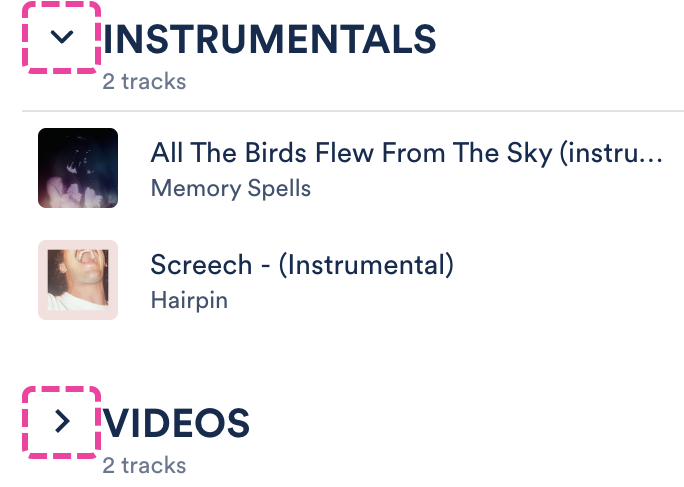
You can add sections when editing Playlists. Sections can be expanded or collapsed to show or hide the Tracks within them:
Adding Sections to Playlists
- Open the Playlist menu (⋮) and select Edit playlist.
- From the Playlist Creator menu (⋮), select Add section.
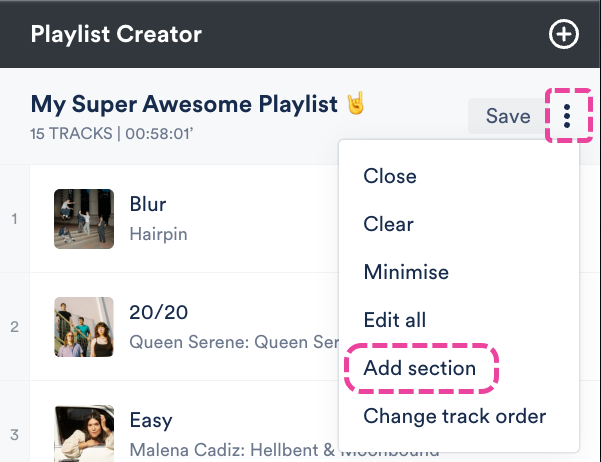
- Enter a Section name and select a radio button to choose where it should be inserted: Insert at the top of the playlist or Insert at the bottom of the playlist.
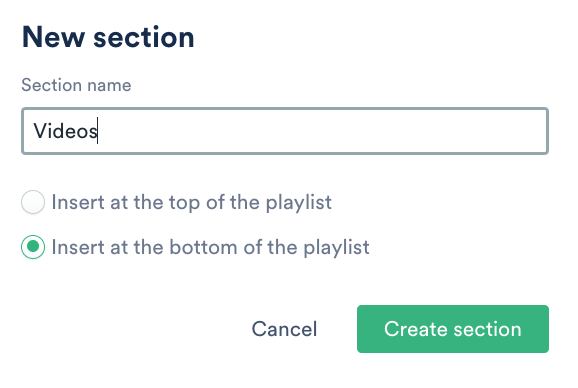
- Click the Create section button.
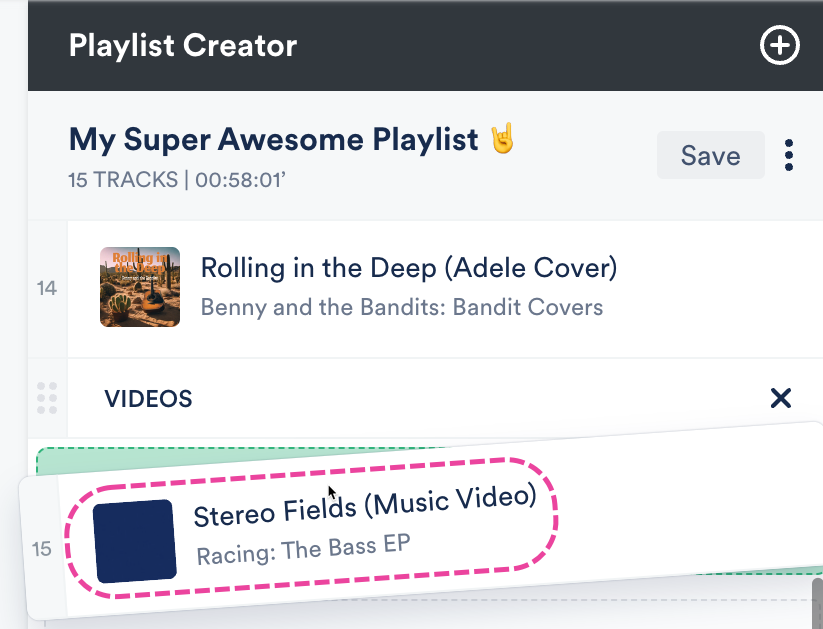
- Drag and drop Tracks into the section.
- Click the Save button in the Playlist Creator.
- In the Save Playlist menu, click the Save Playlist button.
- In your DISCO, Playlist sections are visible from the Explorer.
- On your Playlist Share pages, Tracks in each section will appear under collapsible labeled sections.


Editing and removing Sections in Playlists
Rename a section
Double-click on the section name so your cursor appears.
Rearrange sections
Click and drag the sections up or down in the Playlist Creator.
Reorder Tracks within a section
Click and drag the Tracks up or down in the Playlist Creator to move them within and out of sections.
Remove a section
Hover your cursor over the section. Then click the X icon to Remove from shortlist. This will remove the section but the Tracks within the section will remain in the Playlist.
Downloading and saving Playlists with Sections
In addition to downloading the entire Playlist or individual Tracks, your recipients can also download entire sections with one click!
They can also use the Save to DISCO button to save the section.
Playlist Messages appear at the top of your Playlists and provide your recipients with some additional information.
At a glance
You can use these to call out things like release blurbs, artist bios, or general notes.
Adding a Playlist Message
There are two ways to add a Playlist Message:
From Playlist Settings
- Open the Playlist menu (⋮).
- Select Playlist Settings.
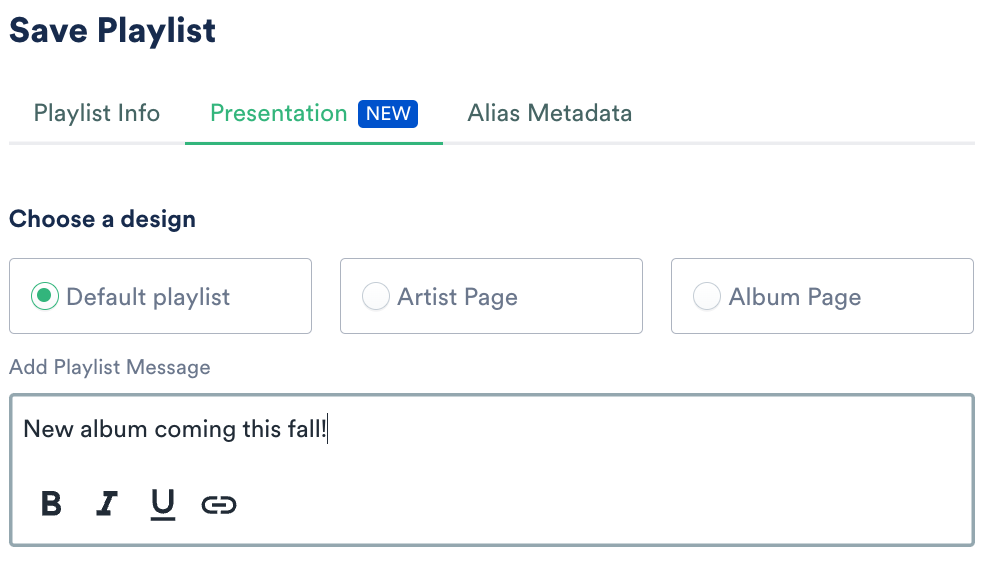
- From the Presentation tab, you can Add Playlist Message.
- Click the Save button.
- Click the Save Playlist button.
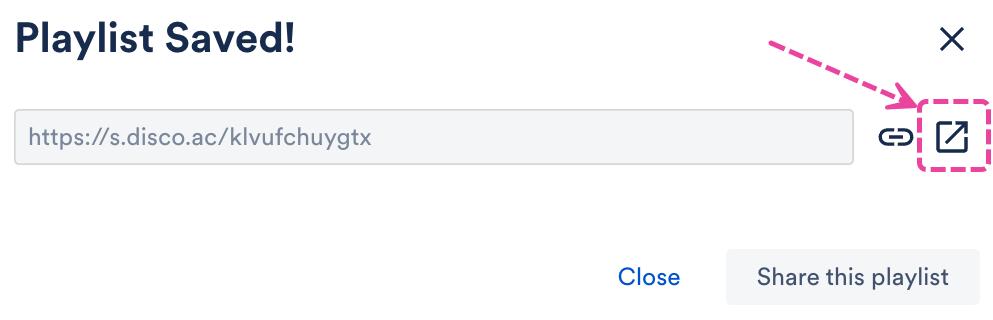
- A confirmation message will appear. To view how the Playlist Message looks, click on the arrow icon to open it in a new tab.


When editing your Playlist
- Open the Playlist menu (⋮).
- Select Edit playlist.
- This will open your Playlist in the Playlist Creator. From the Playlist Creator, click Save.
- In the Save Playlist menu, from the Presentation tab, you can Add Playlist Message.
- Click the Save button.
- Click the Save Playlist button.
- A confirmation message will appear. To view how the Playlist Message looks, click on the arrow icon to open it in a new tab.

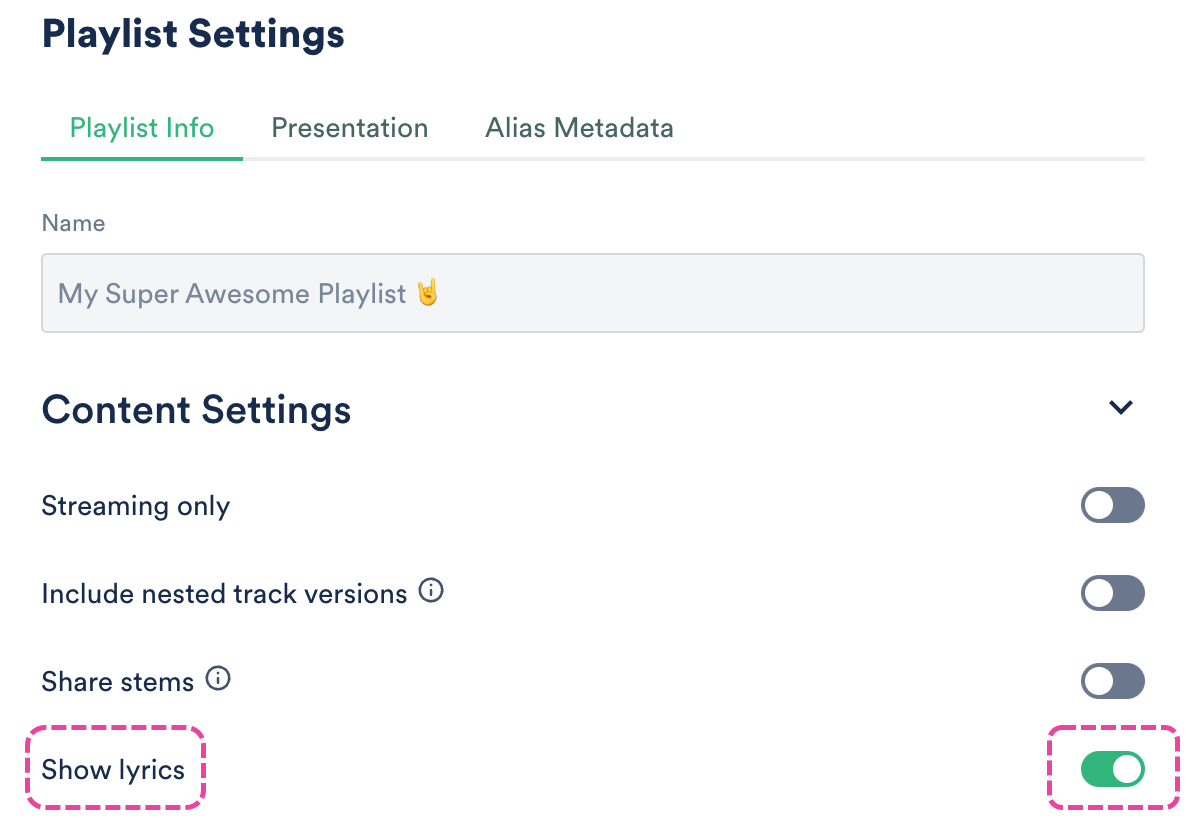
By default, the Title, Album, and Artist metadata for your Tracks will be visible on your Playlist share pages. You can also choose to Show lyrics.
At a glance
Once the Show lyrics setting is enabled, an "i" symbol will appear next to any Tracks that contain lyrics.
Clicking on this symbol will open a new window with the Track lyrics displayed.

This setting is controlled at the Playlist level.
Showing lyrics on Tracks in Playlists
There are two ways to do this:
- from Playlist Settings
- when editing your Playlist
From Playlist Settings
- Open the Playlist menu (⋮).
- Select Playlist Settings.
- From the Playlist Info tab, under Content Settings, set the Show lyrics toggle to ON.
- Click the Save Playlist button.

When editing your Playlist
- Open the Playlist menu (⋮).
- Select Edit playlist.
- This will open your Playlist in the Playlist Creator. From the Playlist Creator, click Save.
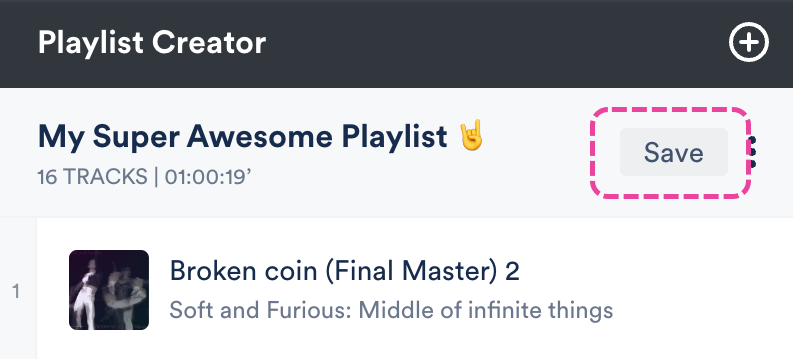
- In the Save Playlist menu, from the Playlist Info tab, set the Show lyrics toggle to ON.
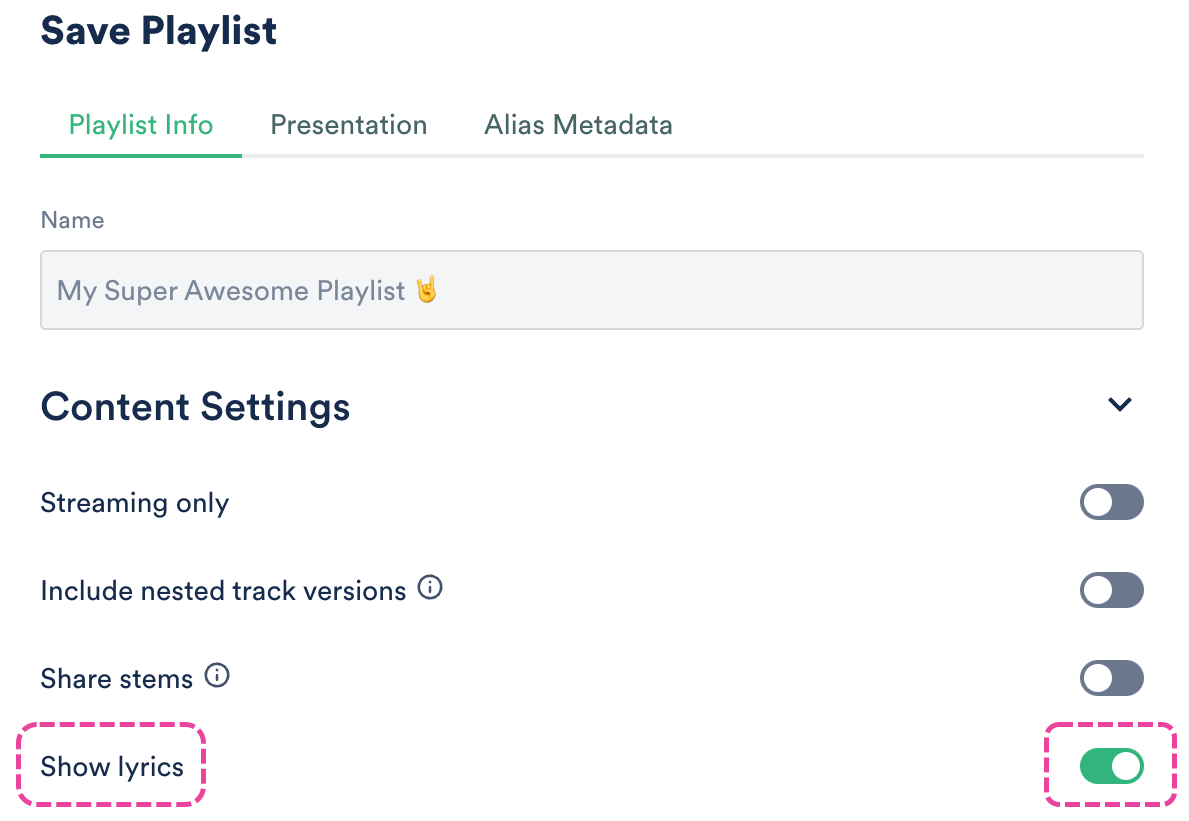
- Click Save Playlist.


You can label a Playlist as a Client Version to keep track of the Playlists you want to send to clients.
At a glance
Client Version Playlists have a 'CLIENT' label added to the Playlist. This label is internal to your DISCO and not visible to the recipient.
This makes it easier for your team to keep track of the final Playlists they send out to clients vs. WIPs, internal ideas, etc.
Labeling a Playlist as a Client Version
There are two ways to do this:
- from Playlist Settings
- when editing your Playlist
From Playlist Settings
- Open the Playlist menu (⋮) and select Playlist Settings.
- From the Playlist Info tab, under Browse Settings, set the Client Version toggle to ON.
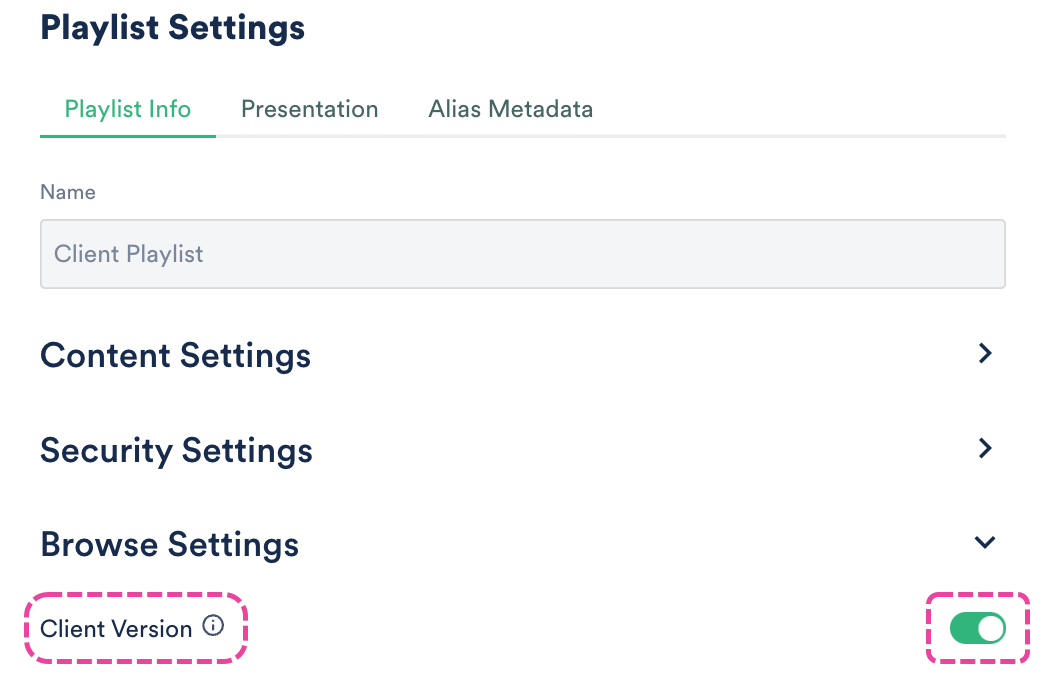
Click the Save Playlist button.

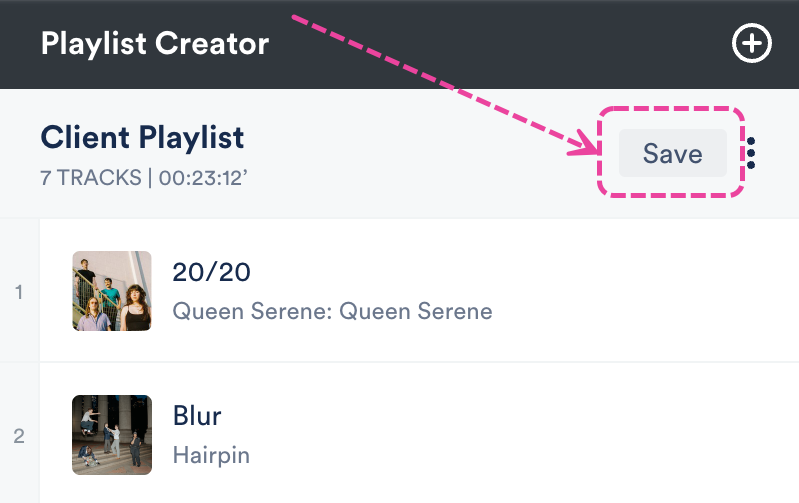
When editing your Playlist
- Open the Playlist menu (⋮) and select Edit playlist.
- This will open your Playlist in the Playlist Creator. From the Playlist Creator, click the Save button.
In the Save Playlist menu, from the Playlist Info tab, under Browse Settings, set the Client Version toggle to ON.
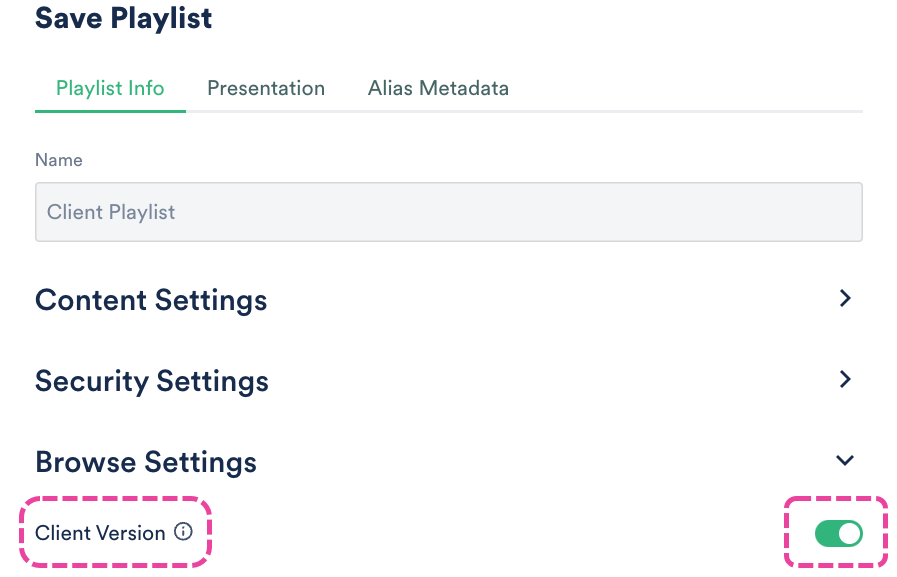
Click the Save Playlist button.


Reporting on Client Version Playlists
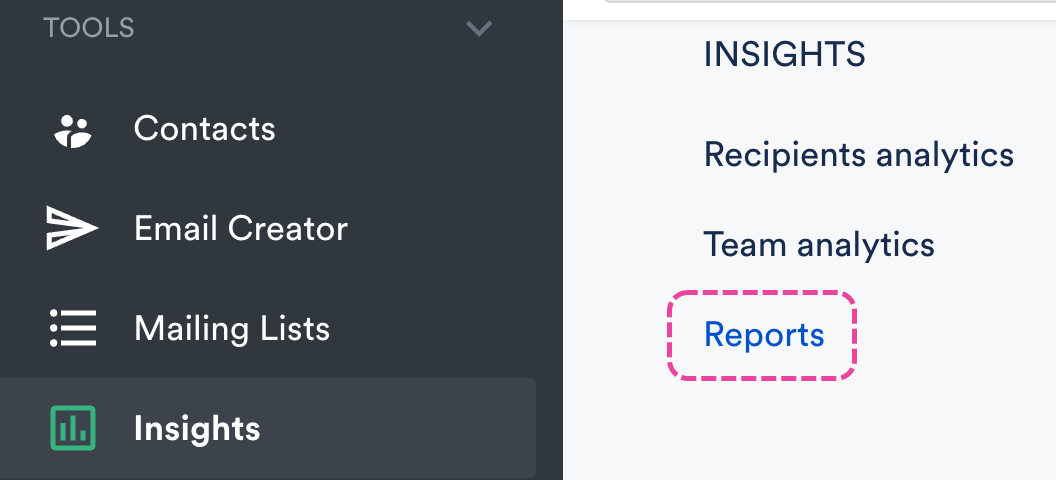
Users on our Plus plan and above create Reports on Client Playlists:
- On the left sidebar of your DISCO, under Tools, select Insights.
- Select Reports.
Under Filters, set the Client lists only field to Yes.
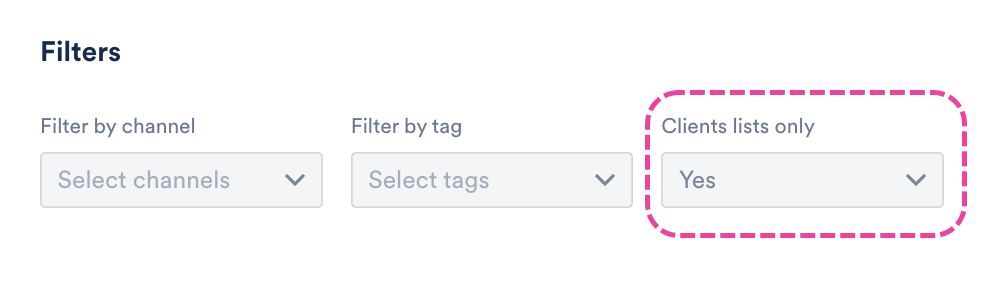
- Add any other information you need, then when you're ready, click the Download report button.
- The results will only show Playlists you have actually sent.


To make sharing your Playlist more secure, you can protect it with a password.
At a glance
This feature is available to users on our Artist and Pro plans.
Enabling password protection
Note: Once you set a password for a Playlist, all Playlist Share URLs for that Playlist will require that password for access.
There are two ways to set a password for your Playlist:
- from the Share Playlist menu
- from Playlist Settings
From the Share Playlist menu:
- Open the Playlist menu (⋮).
- Select Share.
- From the Security tab, set the Password protect toggle to ON.
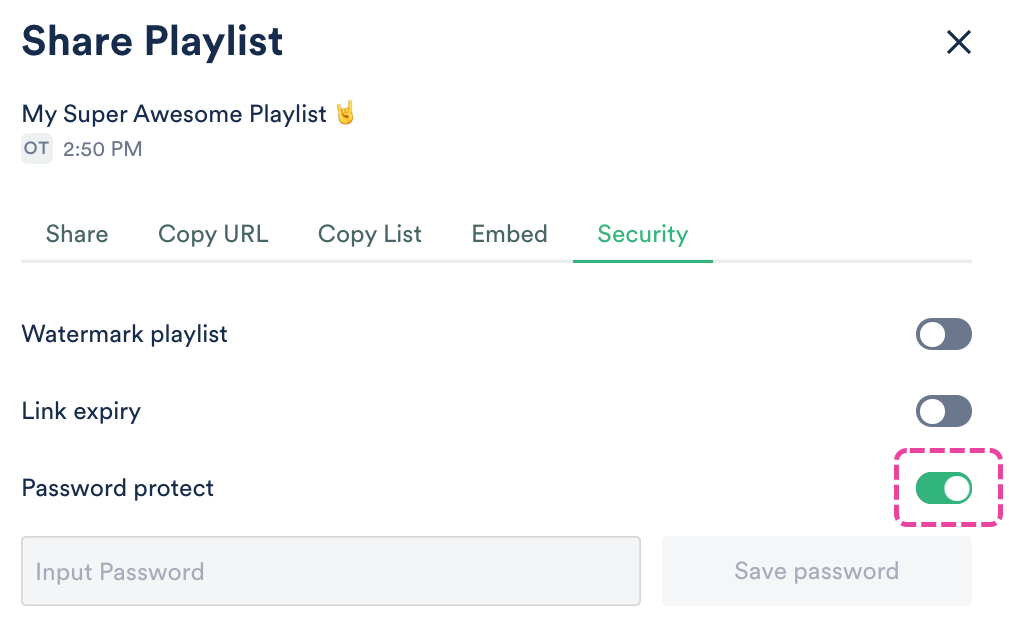
- Input a secure password and click the Save Password button.
- Send the password to the recipient using a secure method, as it cannot be sent via DISCO.
- When the recipient accesses the Playlist, they'll be prompted to enter the password.
- Once the recipient enters the password and clicks the Open playlist button, they'll be able to access it.

From Playlist Settings:
- Open the Playlist menu (⋮).
- Select Playlist Settings.
- From the Playlist Info tab, under Security Settings, set the Password protect toggle to ON.
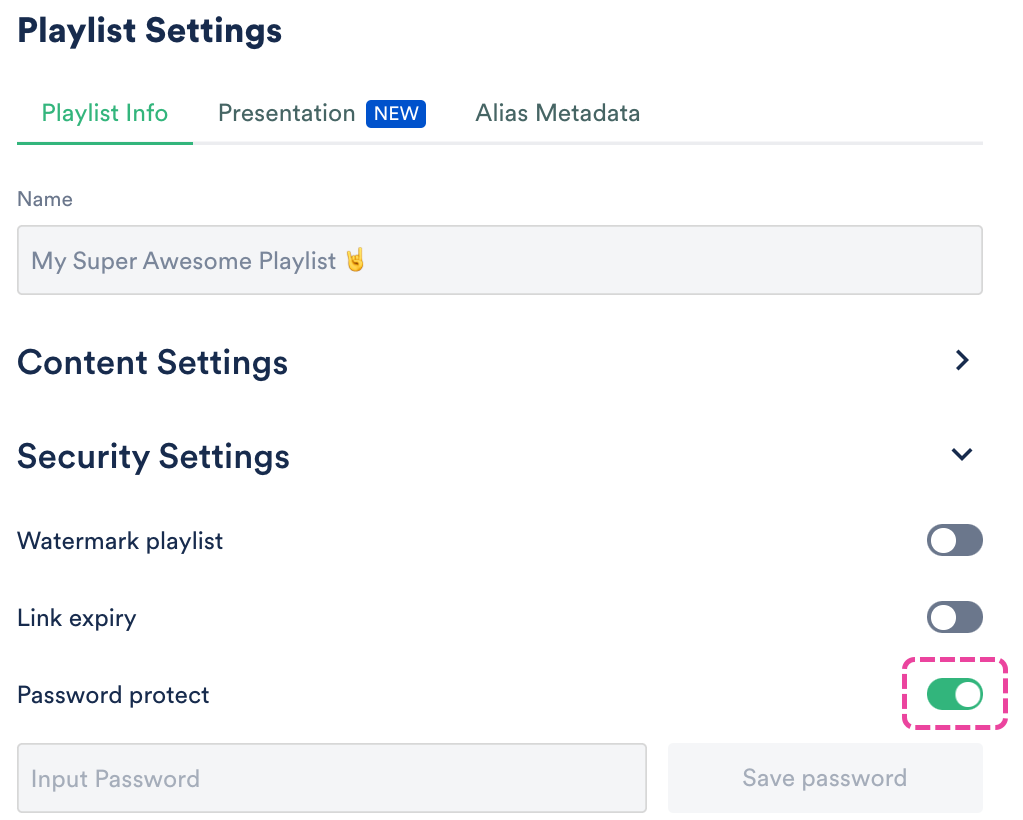
- Input a secure password and click the Save Password button.
- Click the Save Playlist button.
- Send the password to the recipient using a secure method, as it cannot be sent via DISCO.
- When the recipient accesses the Playlist, they'll be prompted to enter the password.
- Once the recipient enters the password and clicks the Open playlist button, they'll be able to access it.

Disabling password protection
Follow the steps above from either the Share Playlist menu or Playlist Settings, and set the Password protect toggle to OFF.
