When you upload tracks to DISCO, we read every metadata field on the track, as long as the audio format (e.g. AIFF, MP3) of the track can embed metadata in a way that is readable. For more information, visit this article.
At a glance
DISCO uses the following fields to display metadata on the Track information page:
|
|
|

Viewing your Track metadata

You can access your metadata from the Track information page in three different ways:
- Open the Track menu (⋮) and select Edit track information.

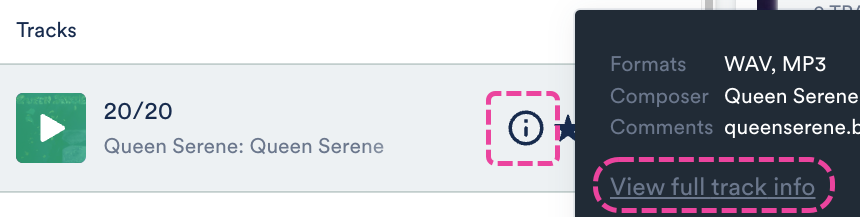
- Hover over the 'i' icon on the Track, and select View full track info.
- Click on a Track to open it in the Explorer. Some* metadata fields will be displayed in the Track detail panel, and you can also click View full track info.
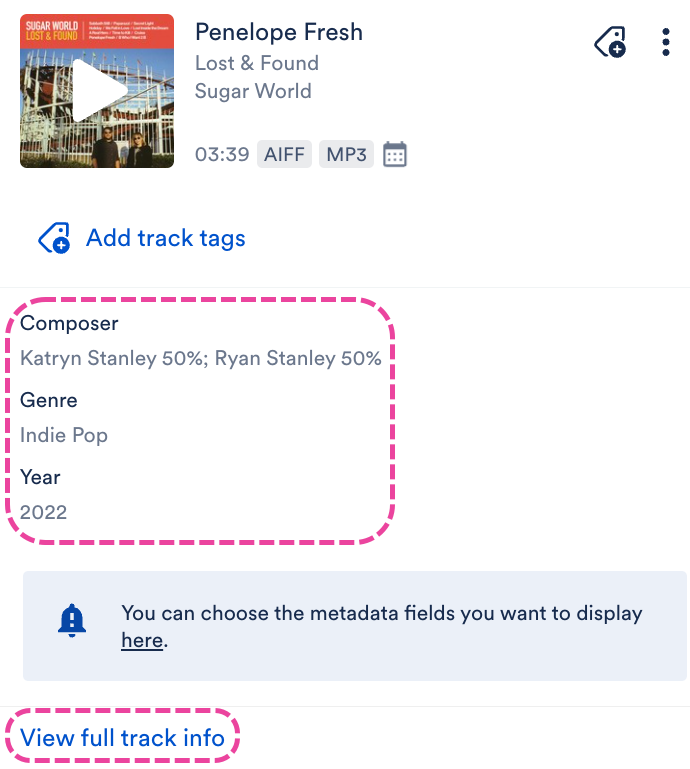 *To customize which fields are displayed here, go to Settings & Account > My Settings > Display Settings > Choose metadata fields displayed in the Explorer.
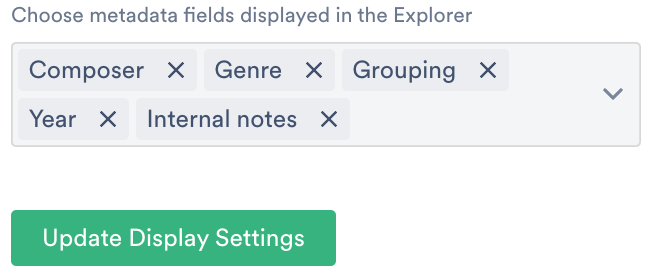


 *To customize which fields are displayed here, go to Settings & Account > My Settings > Display Settings > Choose metadata fields displayed in the Explorer.
All of the above options will open the track information page, with the Metadata tab selected.
Adding and editing Track metadata
You can add and edit metadata for individual Tracks, or for multiple Tracks at once.
For single Tracks
- Open the Track information page.
- From the Metadata tab, you can add and edit: Track Artwork, Title, Artist, Album, Composer, Grouping, Genre, Year, Release Date, BPM, ISRC, Order, Comments.
From the Lyrics tab, you can add and edit Lyrics. From the Writers tab, you can add and edit Writers and PRO Number*. You can also manage Writer Splits.
*This field is for internal use only and doesn't travel with the file when downloaded or saved.
From the Tags tab, you can add and manage Track Tags.
From the Custom tab, you can add and edit data from any custom fields* you may have set up.
*Custom fields are a premium feature available to users on our Pro plan and above.
From the Notes tab, you can view and add Notes. - Click the Save button.
 From the Writers tab, you can add and edit Writers and PRO Number*. You can also
 For multiple Tracks
Note: Using multi-select to edit metadata of nested Tracks is not currently supported. However, if you use the Edit all track metadata option from the Playlist menu (⋮) instead, any non-Title metadata edits will be written to all main and nested Tracks in the Playlist -- this includes Writer Splits, Notes, and Tags too!
- Use multi-select to select multiple Tracks.
- In the Edit menu at the bottom of the screen, click the pencil.

- This will open the Track information page and allow you to edit multiple Tracks at once.
- Click the Save button.

You can easily transfer Track information from one Track to another using the Copy Track info option.
At a glance
This comes in handy when you want to save time on entering metadata, and more specifically for:
- Copying from the main version of a track to alternate versions such as instrumentals, clean versions, or shortened versions
- Copying track information to a new iteration of a track such as from a demo to a first mix to a final master

Accessing the Copy track info option
There are three ways to access this:
- from the Track Menu (⋮)
- when editing Track Information
- from the Actions Menu (⋯) when multiple Tracks are selected
From the Track Menu (⋮)
- Open the Track Menu (⋮) and select Copy track info.
- Select either To this track or From this track.


When editing Track Information
- Open the Track Menu (⋮) and select Edit track information.
- From the Metadata tab, click the arrow next to the Copy track info button.
- Select an option: Copy track info to this track or Copy track info from this track.


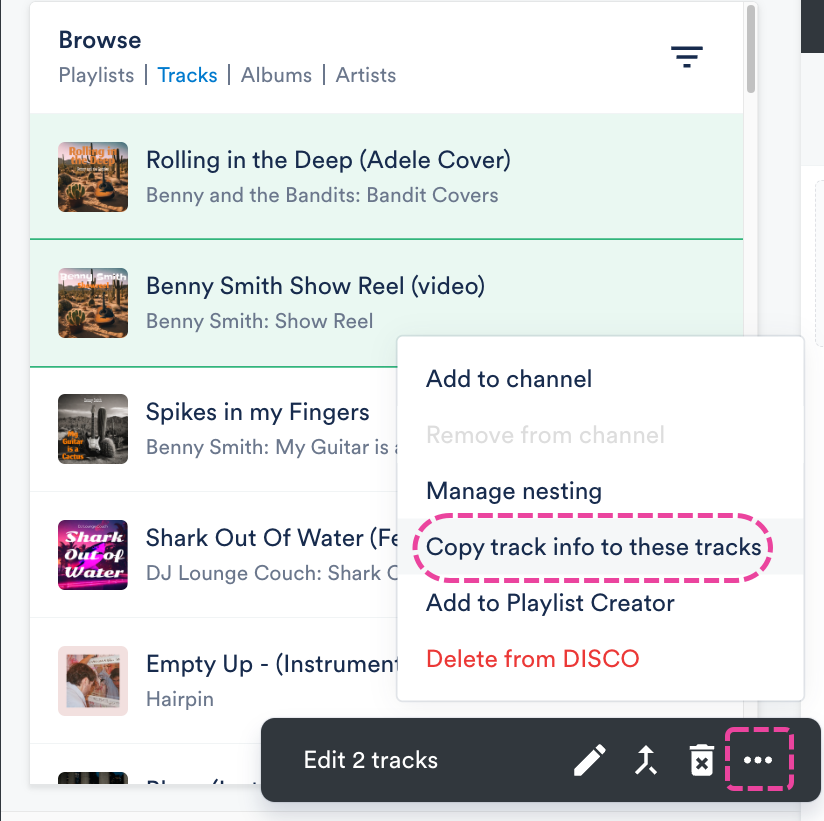
From the Actions Menu (⋯) when multiple Tracks are selected
- Go to Browse > Tracks.
- Use multi-select to select multiple Tracks.
- Open the Actions Menu (⋯) at the bottom of the screen and select Copy track info to these tracks.

Copying Track info between Tracks
From the Copy track info between tracks window, select the Tracks to copy Track info to or from using the search boxes.

Suggested tracks will appear on the other side when you click into that search box as long as there is a Track on one side.

You can drag and drop Tracks between the To and From sides if needed.

Expand the Track Info on each side. By default, all fields will be selected to copy over except for Title (don't want to override -Instrumental, etc.) and Order.

You can decide which fields to copy on the From side by checking or unchecking the boxes.
 The To side will show a preview of how the fields will be updated.

When you've decided on the fields, click the Copy to track button.
A ⚠️Warning message will appear if you are going to overwrite any existing metadata fields. If you're sure, click the Proceed button.

Overwriting metadata fields
When you copy info between Tracks, some metadata fields will be overwritten, and other fields will preserve their data, and the information copied will be added. Below is an overview of each field and what will happen when you copy Track info over:
| Field Name | Overwritten or Added? | Notes / Example |
|---|---|---|
| Metadata | Overwritten | Artist name in the From Track: Harry Potter
Artist name in the To Track: Dumbledore Final Artist name after copying: Harry Potter |
| Writers | Overwritten |
Writers are copied as one unit (not individual Writers) from the From Track and will overwrite any Writers in the To track when the copying is completed. |
| Lyrics | Overwritten | Lyrics are treated as one unit and will overwrite any lyrics on the To track. |
| Notes | Added |
Notes can be added without overwriting. |
| Tags | Added |
Tags can be added without overwriting. |
| Custom fields | Overwritten |
|
Undo copying Track info
Important: This can only be done within 10 seconds after completing the copy action.
After the Track info is copied, a confirmation message will appear in the bottom-left of your DISCO. Click Undo to revert the Track information back to what it was prior to copying.

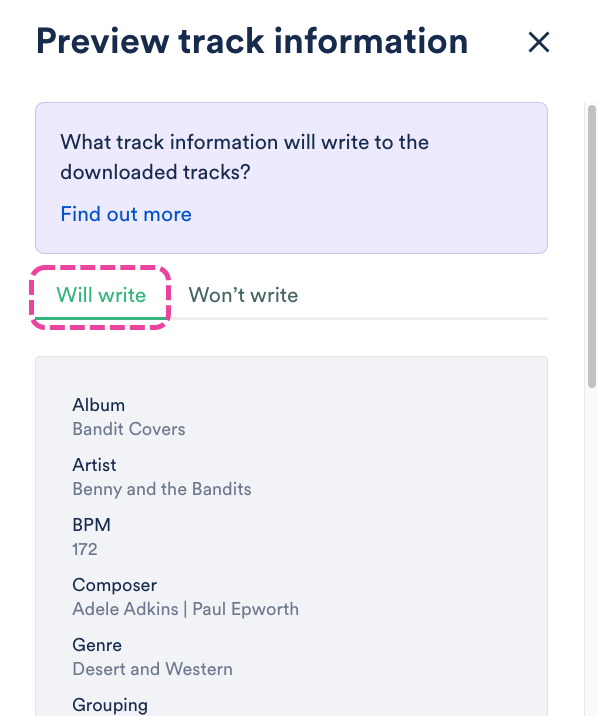
Preview how your metadata will appear after downloading
- Open the Track Menu (⋮) and select Edit track information.
- From the Metadata tab, click the arrow next to the Copy track info button.
- Select Preview track info.
- Two tabs (Will write and Won't write) show which track information will and won't be written to the track once it is downloaded. Select the Will write tab.

Users on our Plus, Pro, and Enterprise plans can request metadata .csv exports for bulk track metadata editing.
At a glance
Exporting and re-importing your Track metadata makes it easy to view, filter, and edit in bulk.
Requesting a CSV export of your Track metadata from your DISCO
You can either request an export of all Tracks in your DISCO, or all Tracks contained in a single Playlist, Channel, Folder, or Subfolder. If you're requesting an export of Tracks from a Subfolder, make sure to also include the name of the parent Channel (e.g. My Channel > Cool Jazz).
To request a CSV export, contact our Support team. We'll generally process these requests within 1 business day.
Once exported, we will send you a CSV file that you can open in any spreadsheet program, such as Excel or Google Sheets.
Note: Any tracks that were not in your DISCO at the time of the export will not be included in the CSV.
Understanding the columns in your CSV file
All Track metadata exports include columns for each of the DISCO standard metadata fields, plus any custom fields you have added to your DISCO.
The spreadsheet below contains information on each of the DISCO standard metadata fields (aside from Writer information, which is available upon request). This table includes how these fields are displayed in your CSV file, and how they are displayed in DISCO:
Requesting a CSV import of your Track metadata into your DISCO
After editing your Track metadata via the CSV file, you can contact our Support team to re-import the file into your DISCO.
Before requesting an import of your Track metadata:
- Keep in mind that we can only import CSVs that were originally provided to you by DISCO.
- When importing metadata into DISCO from another source, you will likely need to figure out how to best map your existing fields to the fields that DISCO uses.
- Refer to the spreadsheet above to make sure the metadata in your file is mapped to the appropriate DISCO standard metadata field.
- Double-check to make sure the metadata in your CSV file is correct.
- Importing your Track metadata via a CSV file will overwrite existing metadata in your DISCO.
- Any edits that you make manually to your track metadata after submitting this request may not be applied properly.
- Any edits that you make manually to your track metadata before the import is processed will be overwritten by the imported CSV.
To request an import of your Track metadata via CSV, contact our Support team. Most import requests take up to 2-3 business days.
When making your request, be sure to let us know:
- which columns you made edits to
- which specific fields you edited (e.g. Title, Album, BPM, Lyrics, etc.)
Important: If you're not using a URL that was sent to you by DISCO, please make sure to set the document's permissions to allow "Anyone with the link" to edit it.
If you upload a Track to DISCO with artwork already included in the metadata, it will be displayed automatically. You can also manually add new or update existing Track artwork.
For your Track artwork, we recommend uploading a square 1400px x 1400px JPG or PNG file at high image quality.
At a glance
Track artwork can be added or updated from the Track Information page.
You can do this for individual Tracks, or multiple Tracks in bulk!
Adding Track Artwork
For a single Track:
- Open the Track menu (⋮) for the desired Track and select Edit track information.Alternatively, you can hover over the 'i' icon on the Track, and select View full track info.

- From the Metadata tab, drag and drop an image under Track Artwork, or click to browse files on your computer.
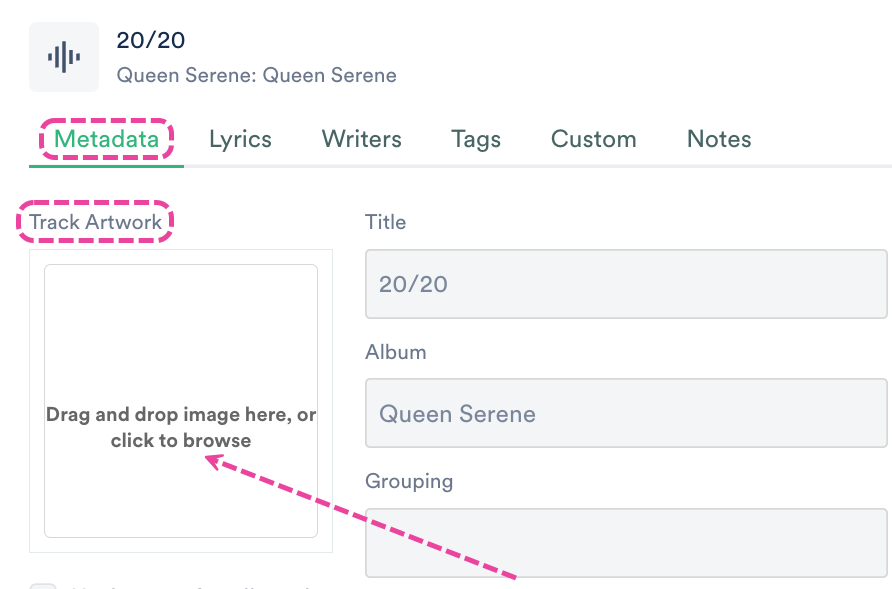
- Click the Save button.
- The artwork will now appear on the Track in DISCO and on any share pages.


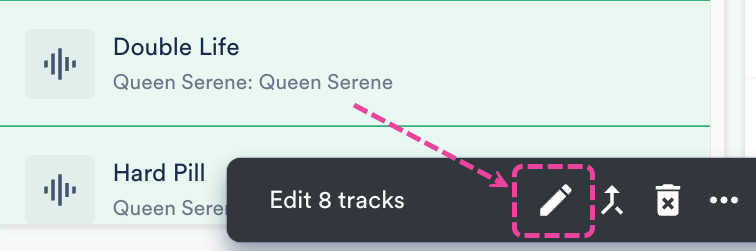
For multiple Tracks:
- Use a keyboard shortcut to multi-select Tracks.
- In the Edit menu at the bottom of the screen, click the pencil.

- From the Metadata tab, drag and drop an image under Track Artwork, or click to browse files on your computer.

- Click the Save button.
- The artwork will now appear for all the Tracks in DISCO and on any share pages.


Updating Track Artwork
For a single Track:
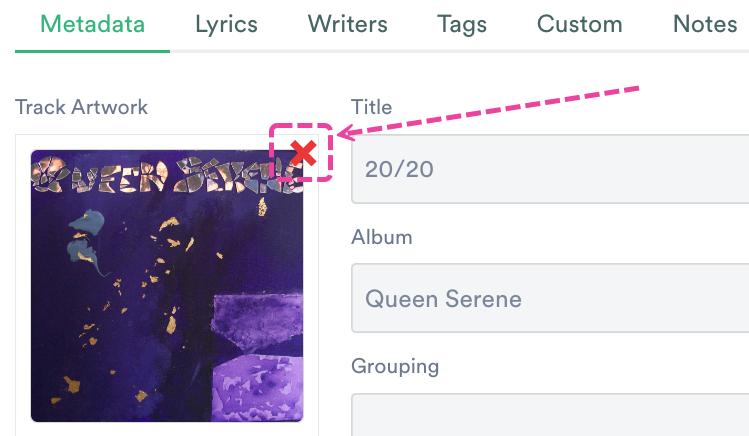
- Open the Track menu (⋮) for the desired Track and select Edit track information.Alternatively, you can hover over the 'i' icon on the Track, and select View full track info.

- From the Metadata tab, under Track Artwork, click the X to remove the current artwork.

- Drag and drop a new image, or click to browse files on your computer.
- Click the Save button.
- The artwork will now be updated for all the Tracks in DISCO and on any share pages.


For multiple Tracks:
- Use a keyboard shortcut to multi-select Tracks.
- In the Edit menu at the bottom of the screen, click the pencil.
- From the Metadata tab, under Track Artwork, click the X to remove the current artwork.
- Drag and drop a new image, or click to browse files on your computer.
- Click the Save button.
- The artwork will now be updated for all the Tracks in DISCO and on any share pages.


Can I add artwork to all Tracks in a Playlist at once?
Yes! Open the Playlist menu (⋮) and select Edit all track metadata:
When editing metadata in DISCO, you can add two types of notes: Internal Notes and Client Notes.
At a glance
Internal Notes have a red eye icon and can only be seen by users with access to your DISCO. These are great for communicating sensitive or important information for your colleagues that shouldn't be visible to clients.
Client Notes have a green eye icon and can be seen by clients and end users. They also appear on public download pages. These are designed for information you want people to notice, such as a key point in the track or copyright information.
Adding Notes
- Open the Track menu (⋮) for the desired track and select Edit track information.Alternatively, you can hover over the 'i' icon on the Track, and select View full track info.

- From the Notes tab, type a note in the Add a note box.
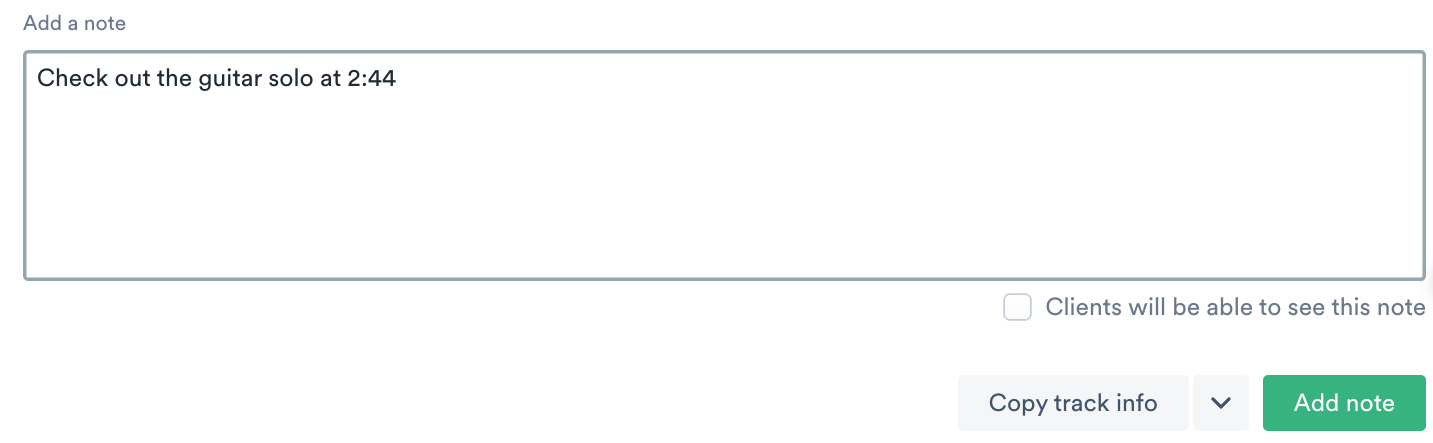
- By default, all notes are internal. To make a note viewable to the client, tick the Clients will be able to see this note box.
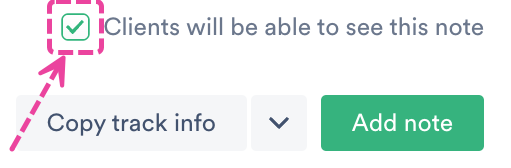
- Click the Add note button.


Viewing Client Notes
From Playlist share pages:
Click the 'i' icon to the right of a Track.
From Track share pages:
You don't have to do anything, they will just be visible on the page under the Track.
Frequently asked questions
- Are Notes searchable within my DISCO?
Yes! All notes, both Internal and Client, are searchable in DISCO.
Artists are created automatically in your DISCO when you upload Tracks. They are pulled from the Artist field in the Track metadata. Once the Artist has been created, you can update their Artist Profile and create an Artist Page.
At a glance
You can find a list of Artists in your DISCO under Browse. The number of Tracks by that particular Artist is displayed under the Artist's name, and you can sort them alphabetically.


Managing Artists
Note: If you can't find an Artist in your DISCO, ensure that the Artist's name appears in the Track metadata and is spelled correctly.
Incorrect Artist name or duplicate Artists
We rely on the Artist field in the Track metadata to create Artists in your DISCO. If the Artist name appears incorrectly, or you have multiple Artists with similar names (whose Tracks should all be under one Artist), it means that there's an error in your Track metadata.
Example
We uploaded multiple Tracks from Sugar World to our DISCO, but one of the Tracks had a typo in the Artist name. Now we have two Artists in our DISCO: Sugar World and Sugar Worlds😅.


To fix this, edit the Track information for the Track(s) with the incorrect Artist name. Update the Artist field and click the Save button.
The incorrect/duplicate Artist will no longer appear in your Artist list in your DISCO.
Managing Artist Profiles
The Artist Profiles in your DISCO are the same ones that are displayed in your DISCO Catalogs.
Editing Artist Profiles
You can edit Artist Profiles to add an Artist image and Artist bio and to Manage social links for the Artist.
- In your DISCO, go to Browse > Artists.
- Locate the Artist from the list, hover over their name, and click the pencil that appears on the right of the name to Edit profile.
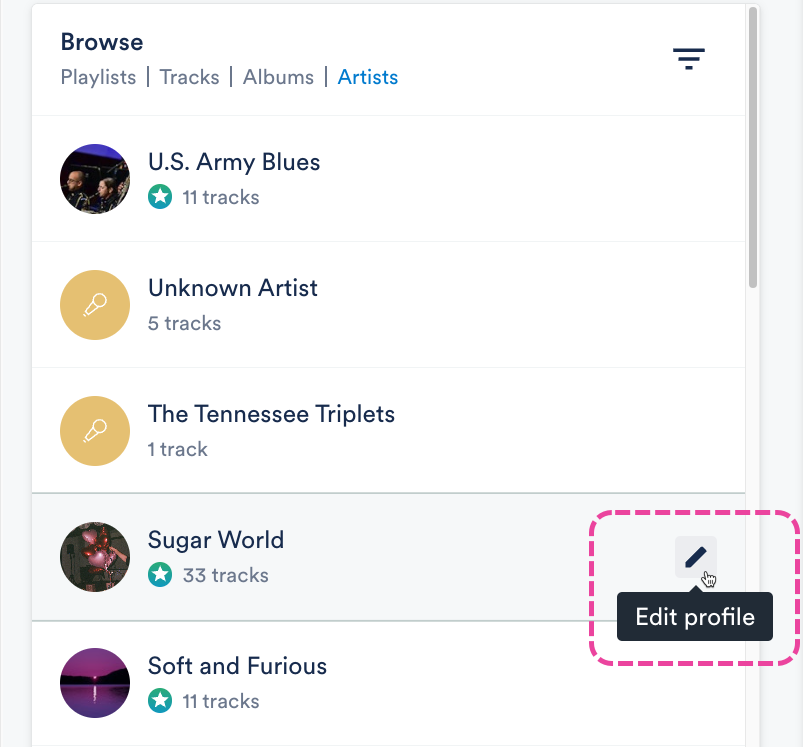
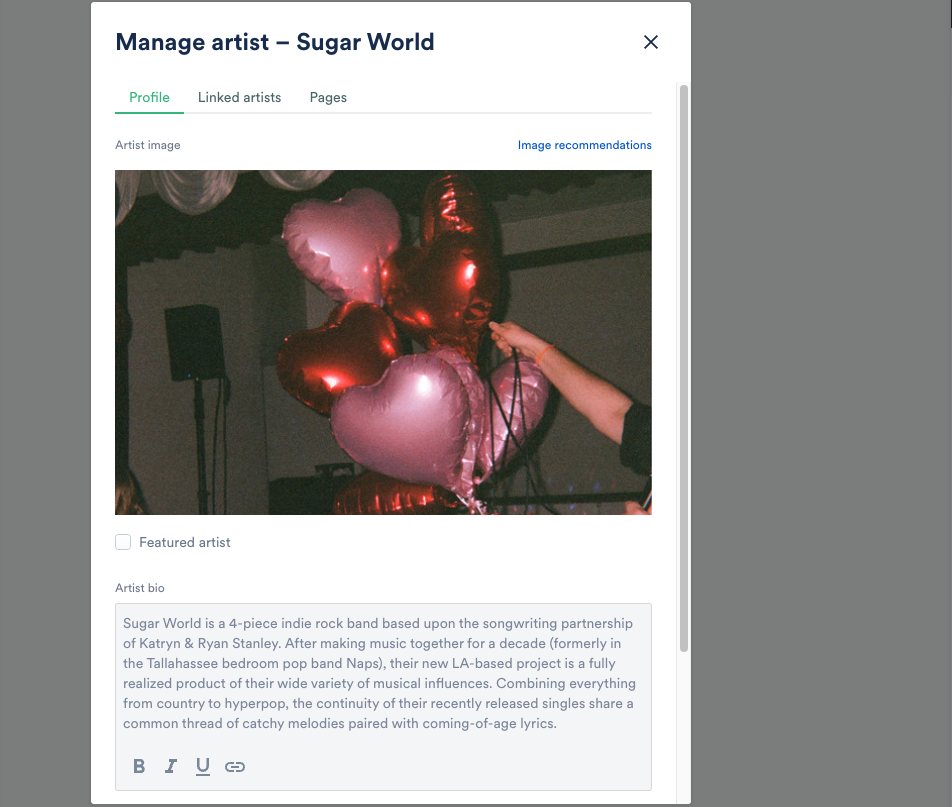
- This will open the Manage artist page for the Artist.


Adding and updating Artist images
Note: If you're adding an Artist image for the first time and notice there's already one populated in your DISCO, it's because we automatically pulled the image from your Spotify account. This happens only if the Artist name is an exact match, and there wasn't any artwork previously associated with the Artist in your DISCO.
- From the Manage artist page, under Artist image, click in the box to upload or remove the image. Be sure to check the Image recommendations and this article for more details.
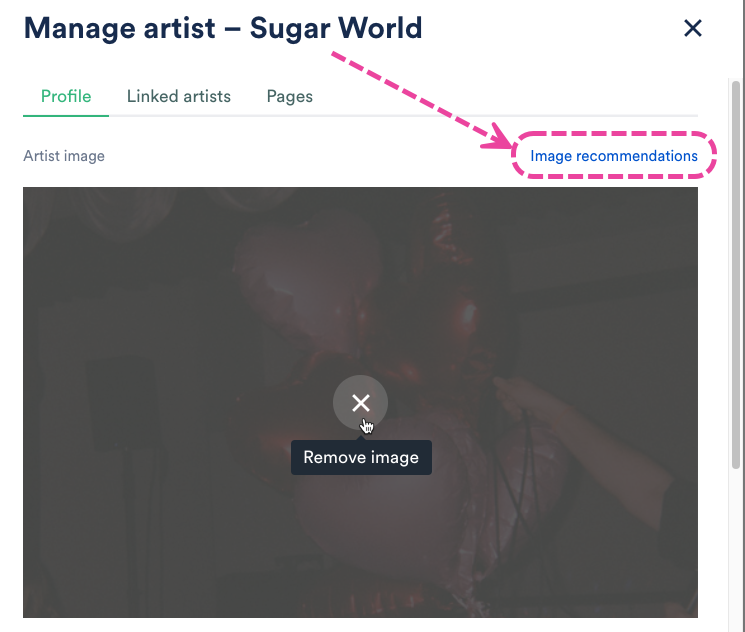
- Click the Save button.

Adding and updating Artist bios
- From the Manage artist page, locate the Artist bio and add your text.
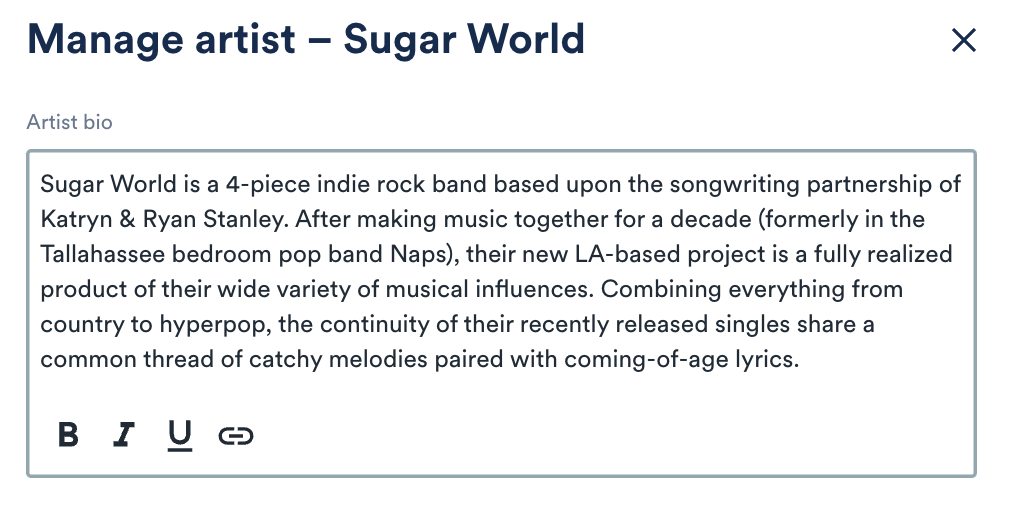
- Click the Save button.

Adding and updating social links
- From the Manage artist page, locate the Social Links section and click Manage social links.
- Add or update your social links and the link to your Primary Catalog (optional).
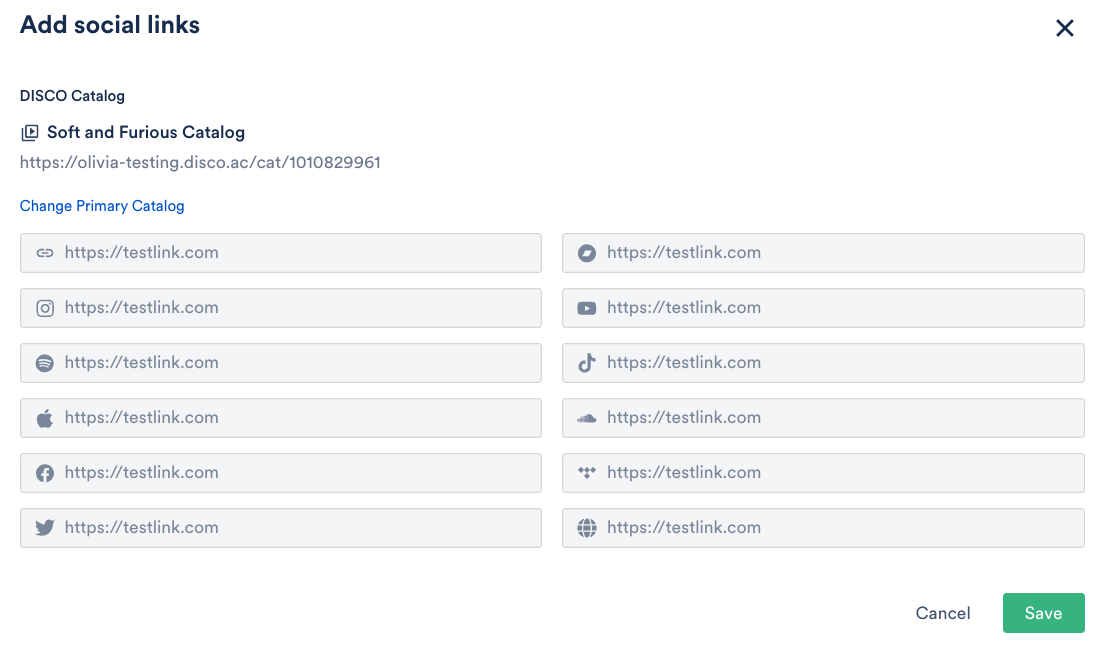
- Click the Save button.
- On the Manage artist page, click the Save button.

Linking Artist Profiles
Visit this article for more information on Linking Artist Profiles.
Artist Pages
You can create an Artist Page from the Artist Profile. Visit this article for more information on Artist Pages.
Once a Page has been created for an Artist, it will appear in the Explorer once the Artist is selected from the Browse section.
The star icon underneath an Artist's name indicates they have a Page.
By default, the Artist image and Artist bio from the Artist Profile will also pre-populate on any Artist Pages and Album Pages that are associated with that Artist. However, it is possible to change the image and bio for the Artist on specific Pages.
The Artist Profiles in your DISCO are the same ones that are displayed in your DISCO Catalogs under Artists (in the left sidebar). You can link multiple Artist Profiles together so that users are presented with a consolidated Artist Profile when browsing through Tracks with different Artist names in your Catalog.
At a glance
This is useful for Artists who have bodies of work under different aliases or just prefer all of their Tracks to appear under the same Artist Profile in their Catalog.

Linking Artist Profiles
There are two ways to do this:
- from within an Artist Profile
- from your Catalog Settings
Before linking, determine which will be the parent artist, or the artist whose Profile under which Tracks from the other artist aliases will be nested.
Example
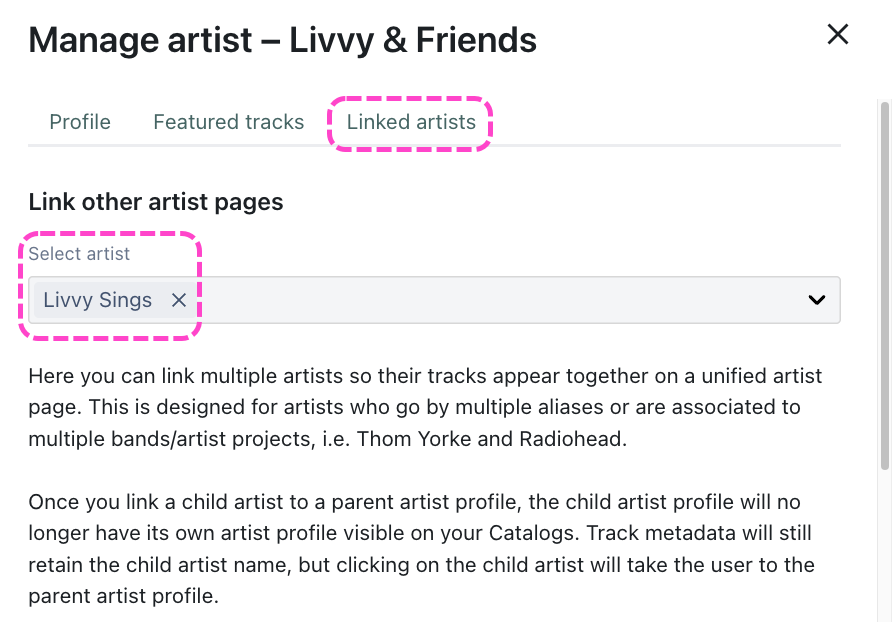
We want Livvy & Friends to be the parent artist, meaning Tracks from Livvy Sings should be nested under the Livvy & Friends Artist Profile.
From within an Artist Profile
- Open the Artist Profile for the parent artist.
- Select the Linked artists tab.
- Select the artist(s) you want to link from the dropdown.

- Select the Profile tab and click the Save button.

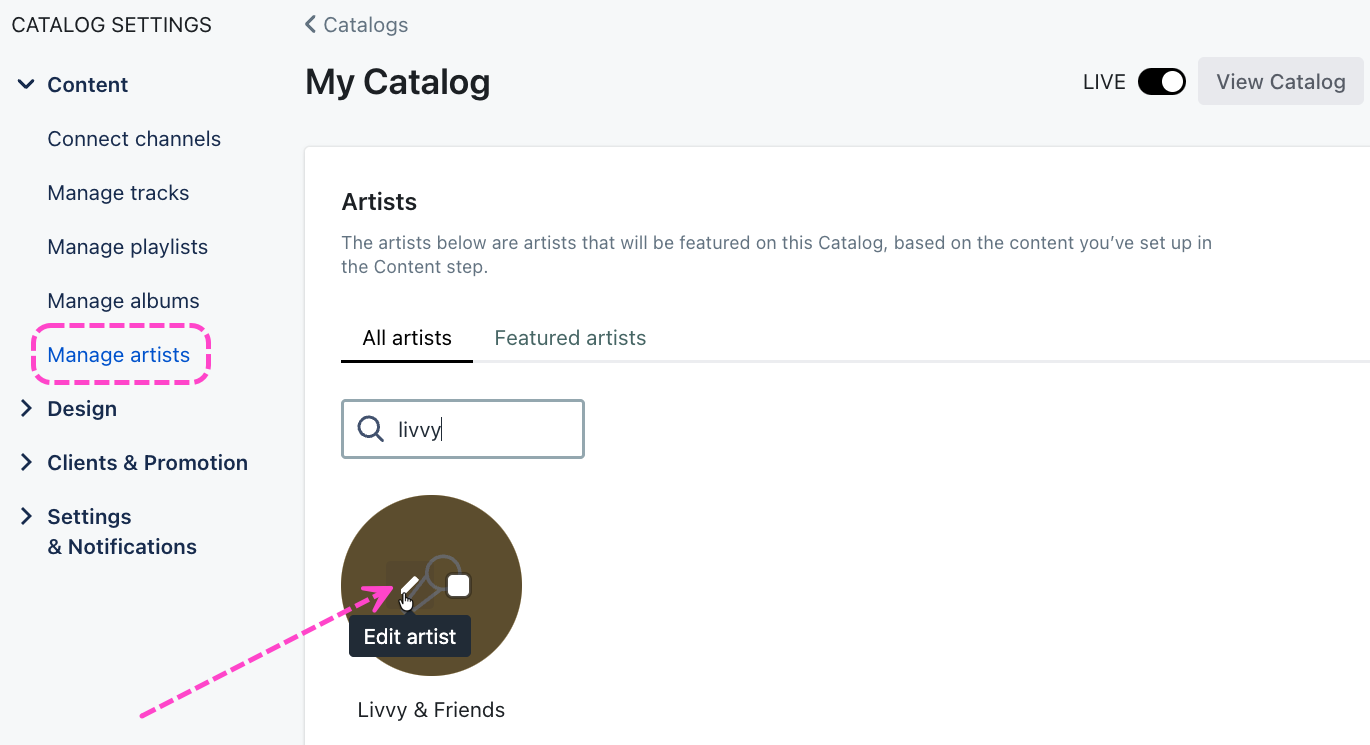
From your Catalog Settings
- Open the Catalog Settings for the desired Catalog.
- Under Content, select Manage artists.
- Locate the parent artist, hover over the thumbnail, and click the pencil to Edit artist.
- In the Manage artist window, select the Linked artists tab.
- Select the artist(s) you want to link from the dropdown.
- Select the Profile tab and click the Save button.


Viewing linked artists in your Catalog
After the artists are linked, only the parent artist will have an Artist Profile in your Catalog.
With Alias metadata, you can control what metadata on your Tracks gets shared.
At a glance
Alias metadata is included in all DISCO plans at no additional cost. On Artist plans, it is available only at the individual Track level. On Plus plans, it is available only at the Playlist level. On Pro plans and above, it is available at both Track and Playlist levels.
It is especially useful for the following use cases:
- your Track metadata contains internal information, such as Tags, Notes, or other people's contact info that you'd prefer not to share with recipients
- you'd like to make a compilation from existing Tracks, but you want it to include more specific or relevant metadata (e.g. Album art or Title)
- you'd like to change the Track metadata appears for a particular recipient, without changing how it appears in your DISCO
- you'd like only certain fields to be displayed and downloaded
- you'd like to overwrite metadata for specific Playlists
Alias metadata will be shown on your public Playlist share URLs, when you share Playlists directly with other DISCOs, and when the Playlist is downloaded or Saved to DISCO by another DISCO user.

Setting Alias metadata at the Track level (for all Tracks you share)
Note: These instructions apply to users on the DISCO Pro plan and above.
- In the top-left corner of your DISCO, click on your DISCO Business Name to open the menu.
- Select Settings and Account.
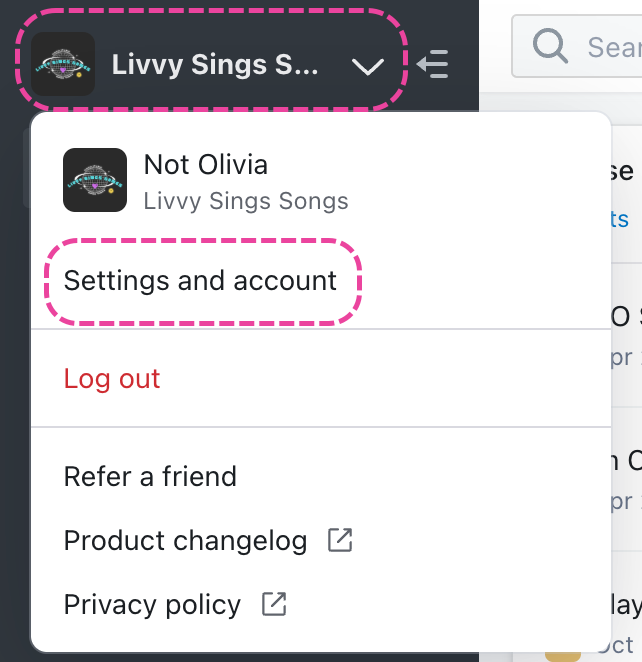
- Under Workspace Settings, select Metadata.
- Under Metadata settings, there's an option to Include the following metadata in the tracks I share: Artist, Album, Genre, Composer, Grouping, and Comments. If you uncheck any of these fields, this metadata field will be left blank on tracks you share (you can also choose to override this if needed when saving a Playlist – more on that below).
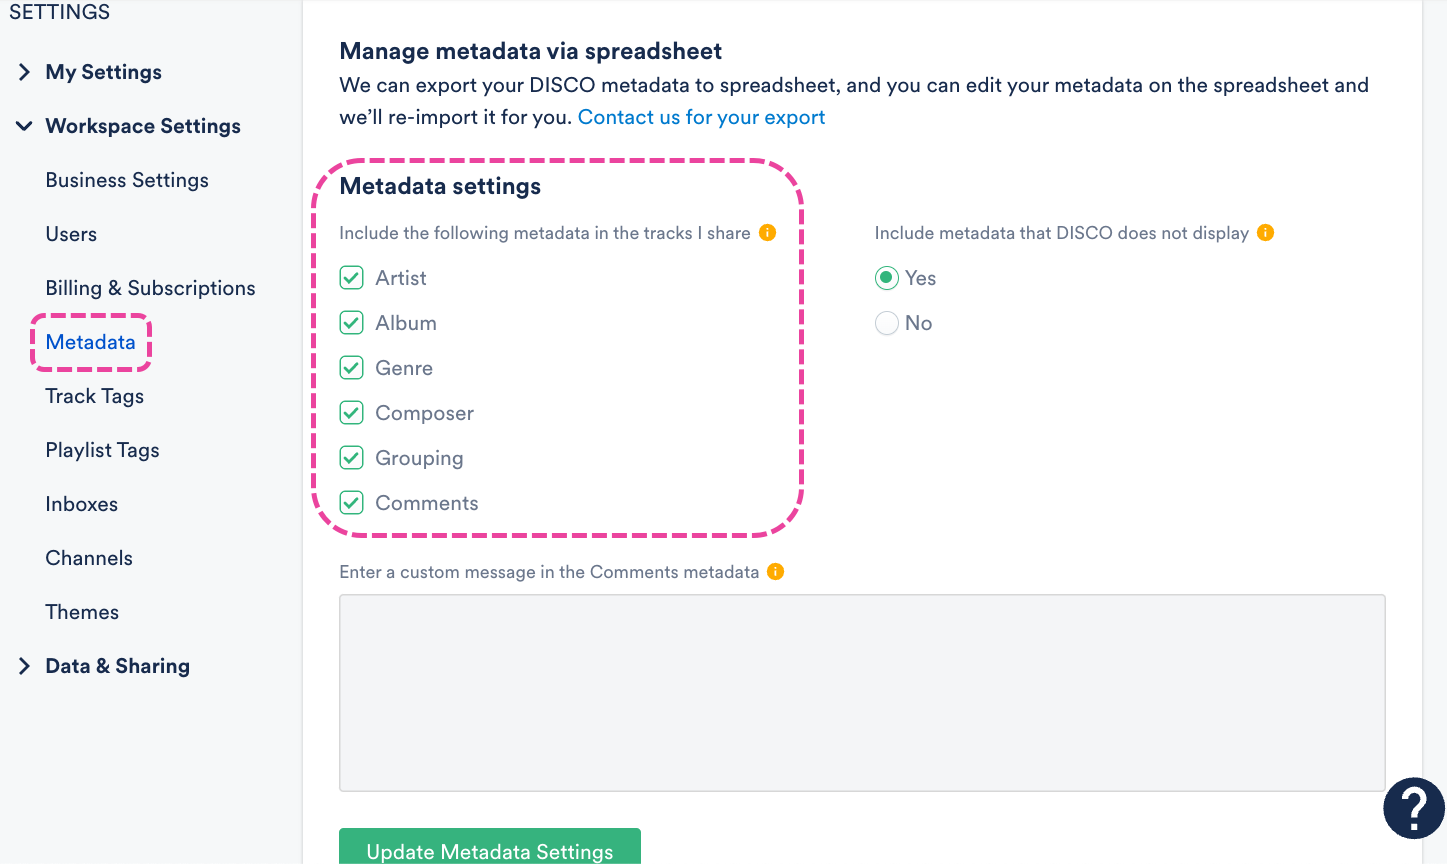
- There is also an option to Include metadata that DISCO does not display, which you can set to Yes or No. This refers to the ID3 standard metadata fields that DISCO doesn't display, but we do read and write them to files when they're downloaded. If you'd like us to continue writing data from these fields on your Tracks, select Yes. If you'd like data from these fields to not be written to your Tracks, select No. This can also be set at the Playlist level.
- Lastly, there is an option to Enter a custom message in the Comments metadata. If you choose to enter something in here, it will be included in the Comments field for all Tracks you share. If a Track already has Comments metadata, and you haven't disabled this field by unchecking the box under Include the following metadata fields in the tracks I share, then the custom message will be added to the Comments field in addition to any existing Comments metadata on that Track. For example:
Existing Comments metadata on my Track // Custom message entered in Metadata settings
- These Metadata settings will be applied when you share individual Tracks from your DISCO.


Setting Alias metadata at the Playlist level
Note: These instructions apply to users on the DISCO Plus plan and above.
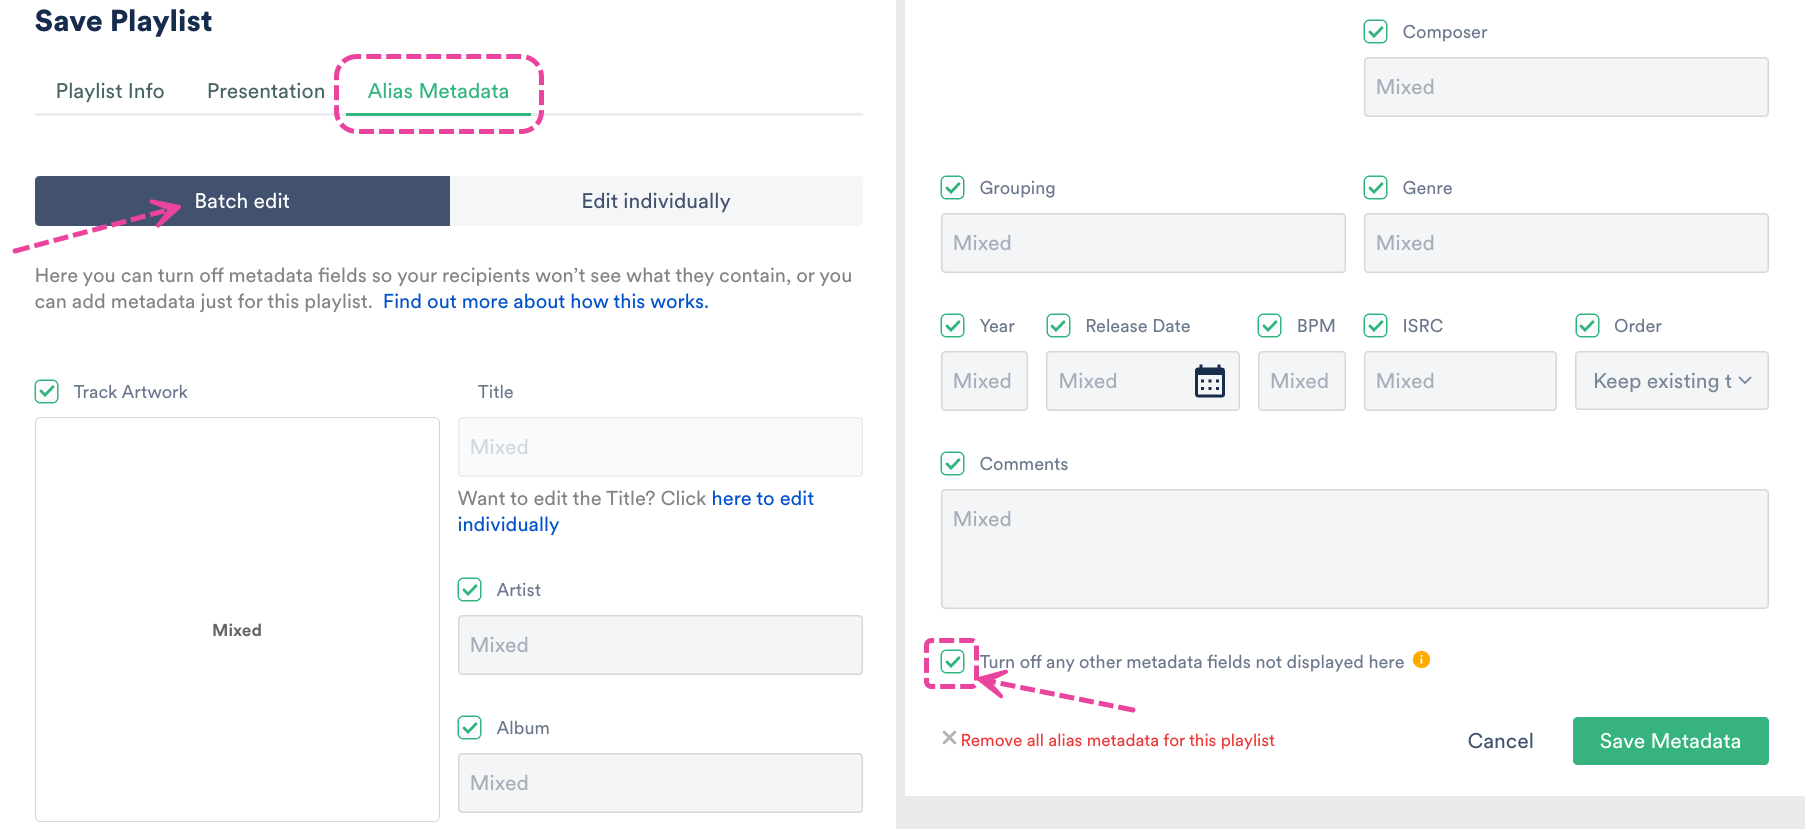
You can do this from your Playlist Settings or when saving your Playlist from the Save Playlist menu. There are also two options when adding Alias Metadata: Batch edit and Edit individually.
- From Playlist Settings: Open the Playlist menu (⋮) and select Playlist Settings. Then select the Alias Metadata tab.
From the Save Playlist menu: Select the Alias Metadata tab. - From the Alias Metadata tab, select an option: Batch edit or Edit individually.
- Batch edit -- You can apply the same alias metadata for all Tracks in the Playlist. In this view, you can disable any fields you don't want to be populated on your Tracks by unchecking the boxes. But, if you leave the box next to a field checked but don't enter a new value, it will be populated with its regular metadata. You also have the option to Turn off any other metadata fields not displayed here. This refers to the ID3 standard metadata fields that DISCO doesn't display, but we do read and write them to files when they're downloaded. If you'd like us to continue writing data from these fields on your Tracks, leave the box unchecked. If you'd like data from these fields to not be written to your Tracks, check the box.

- Edit individually -- You can edit the alias metadata for each Track in the Playlist individually, but only three fields are available in this view: Title, Artist, and Album.
- Batch edit -- You can apply the same alias metadata for all Tracks in the Playlist. In this view, you can disable any fields you don't want to be populated on your Tracks by unchecking the boxes. But, if you leave the box next to a field checked but don't enter a new value, it will be populated with its regular metadata. You also have the option to Turn off any other metadata fields not displayed here. This refers to the ID3 standard metadata fields that DISCO doesn't display, but we do read and write them to files when they're downloaded. If you'd like us to continue writing data from these fields on your Tracks, leave the box unchecked. If you'd like data from these fields to not be written to your Tracks, check the box.
- If you've set alias metadata from your account settings (see the section above), these settings will be reflected in these fields, but you can overwrite them here for this specific Playlist if you like. Also, adding or updating metadata in these fields will display and write it to these Tracks, but just for this Playlist. The metadata for the Tracks in your DISCO will not be changed.
- Click the Save Metadata button.
- Click the Save Playlist button.


Removing Alias metadata at the Playlist level
Note: These instructions apply to users on the DISCO Plus plan and above.
- From Playlist Settings: Open the Playlist menu (⋮) and select Playlist Settings. Then select the Alias Metadata tab.
From the Save Playlist menu: Select the Alias Metadata tab. - From the Alias Metadata tab, select an option: Batch edit or Edit individually.
- At the bottom of the Save Playlist window, click the red text the says Remove all alias metadata for this playlist.
- Click the Save Metadata button.
- Click the Save Playlist button.

Viewing Alias metadata for Tracks in your DISCO
You can view Alias metadata that's been individually-applied to your Tracks from within your DISCO:
- From the Track menu (⋮), select Edit Track Information.
- Click Show aliases.
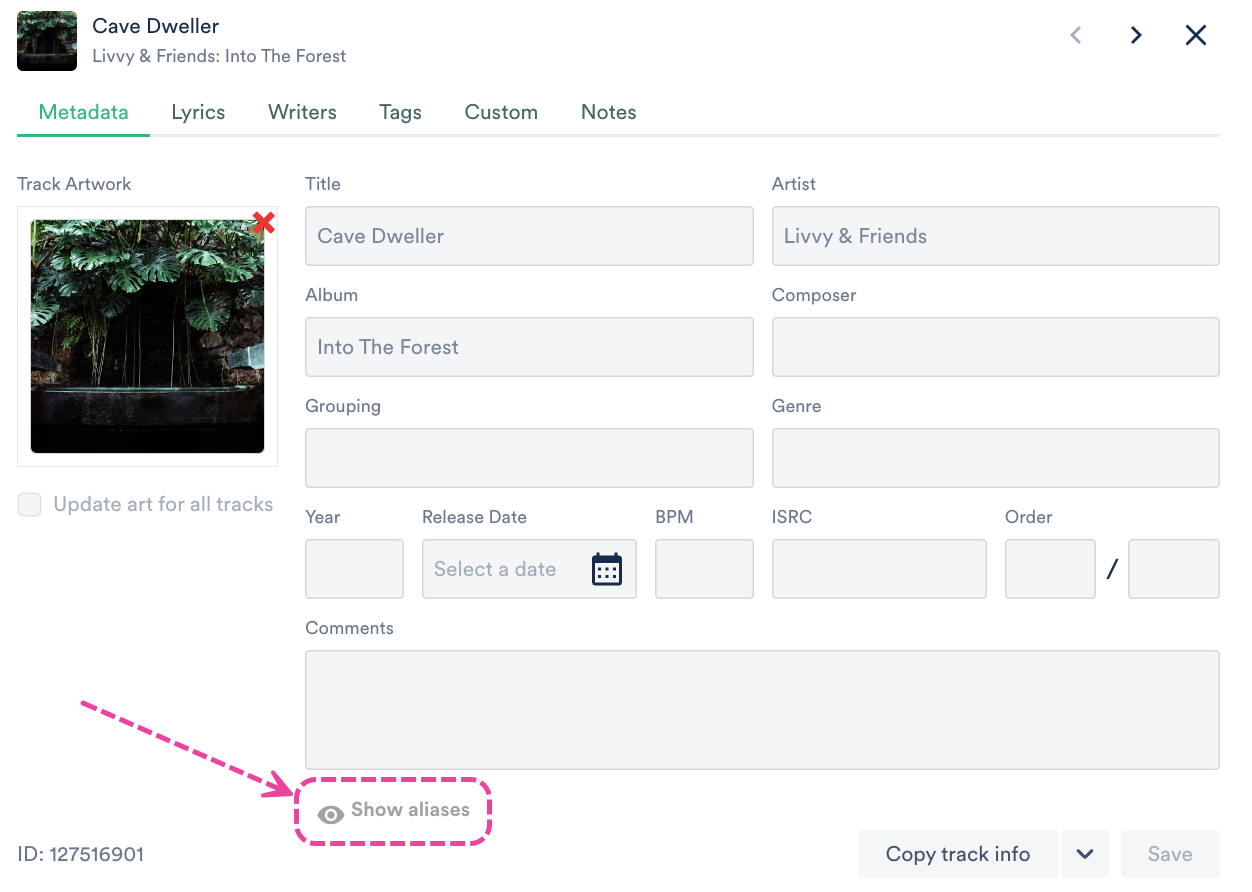

Please note that this feature is only available for Alias metadata that has been applied to the track(s) individually, rather than through bulk application.
